Best Turkey-Stuffed Pierogis with Herb Ricotta Filling
I’m Polish, of course, I’m making Turkey-Stuffed Pierogis with Herb Ricotta Filing for Thanksgiving this year. When I got this idea, it felt like I won the jackpot. After you taste the pierogies, you will feel the same.
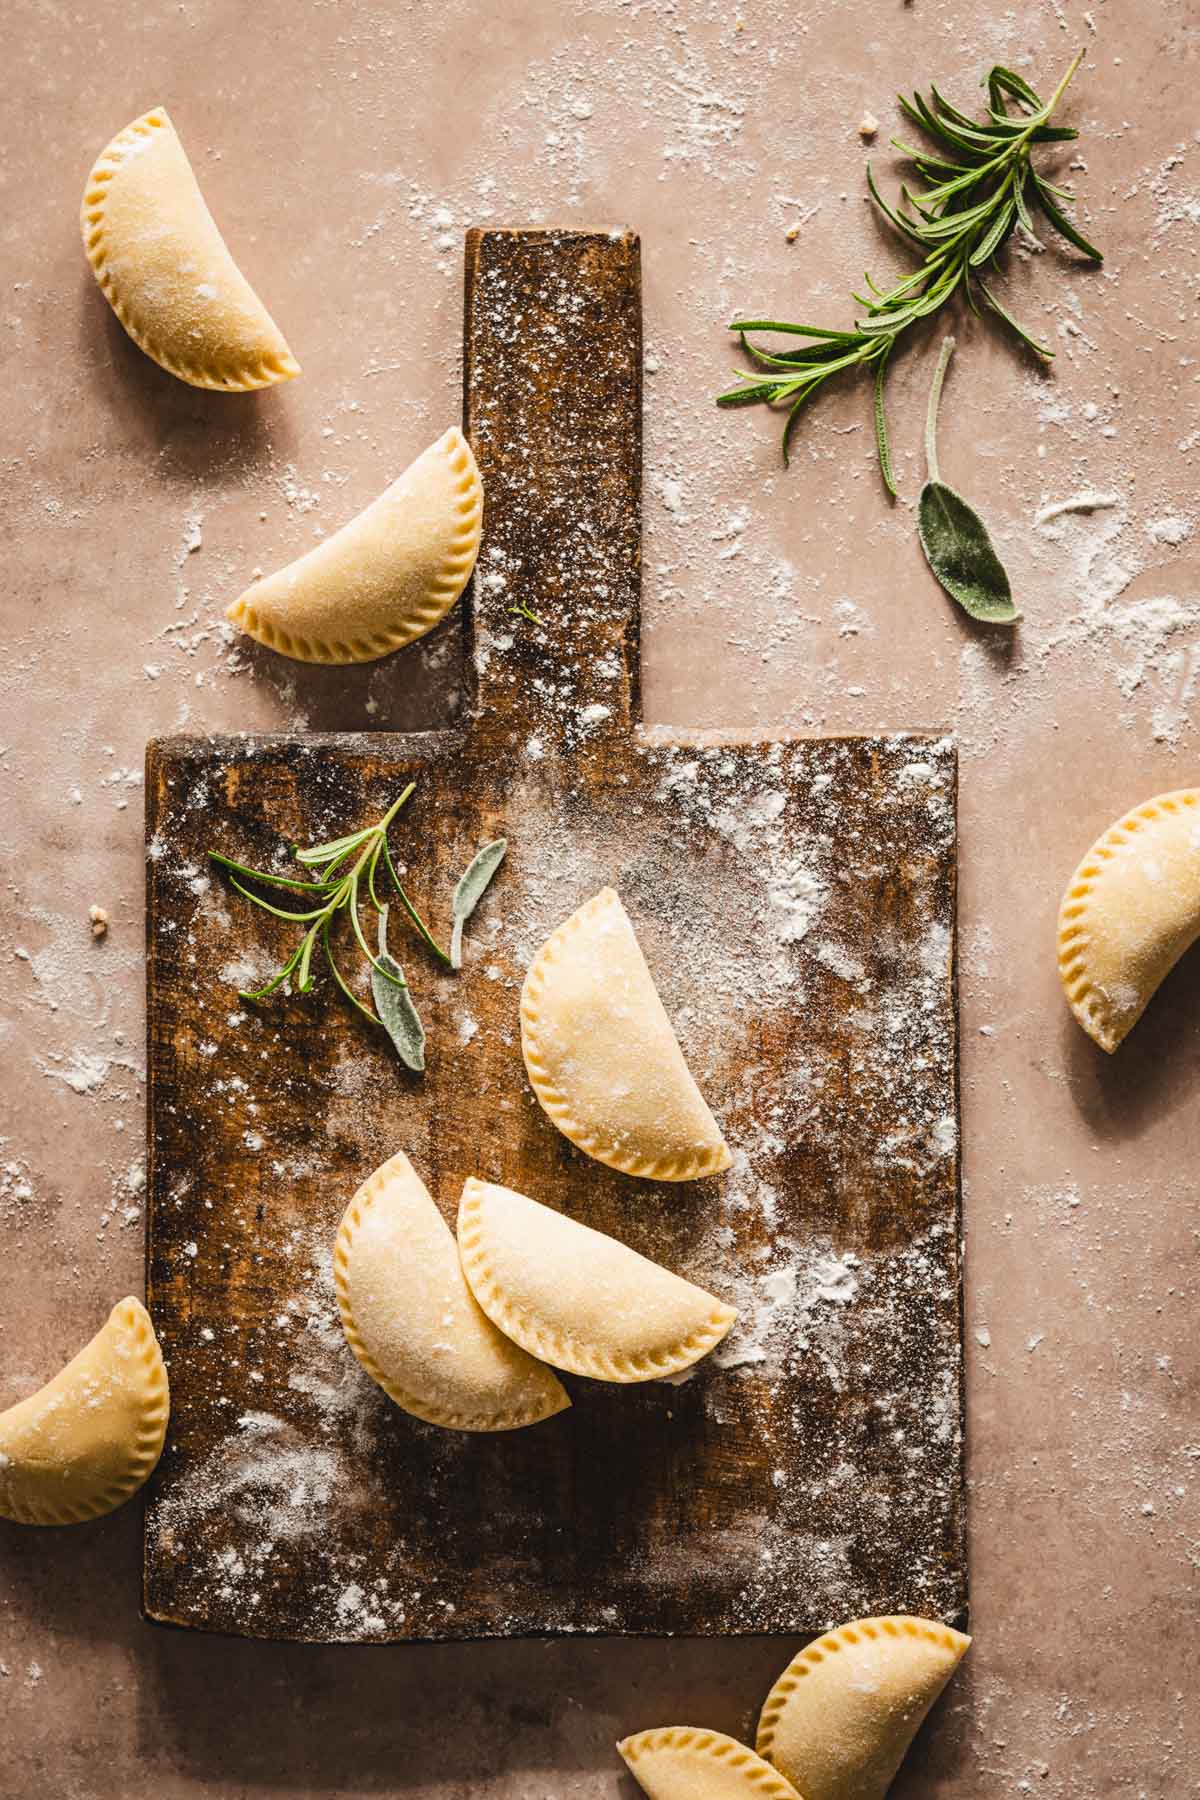
Delicate, shredded turkey mixed with fresh herbs and creamy ricotta, all wrapped in a tender pierogi dough.
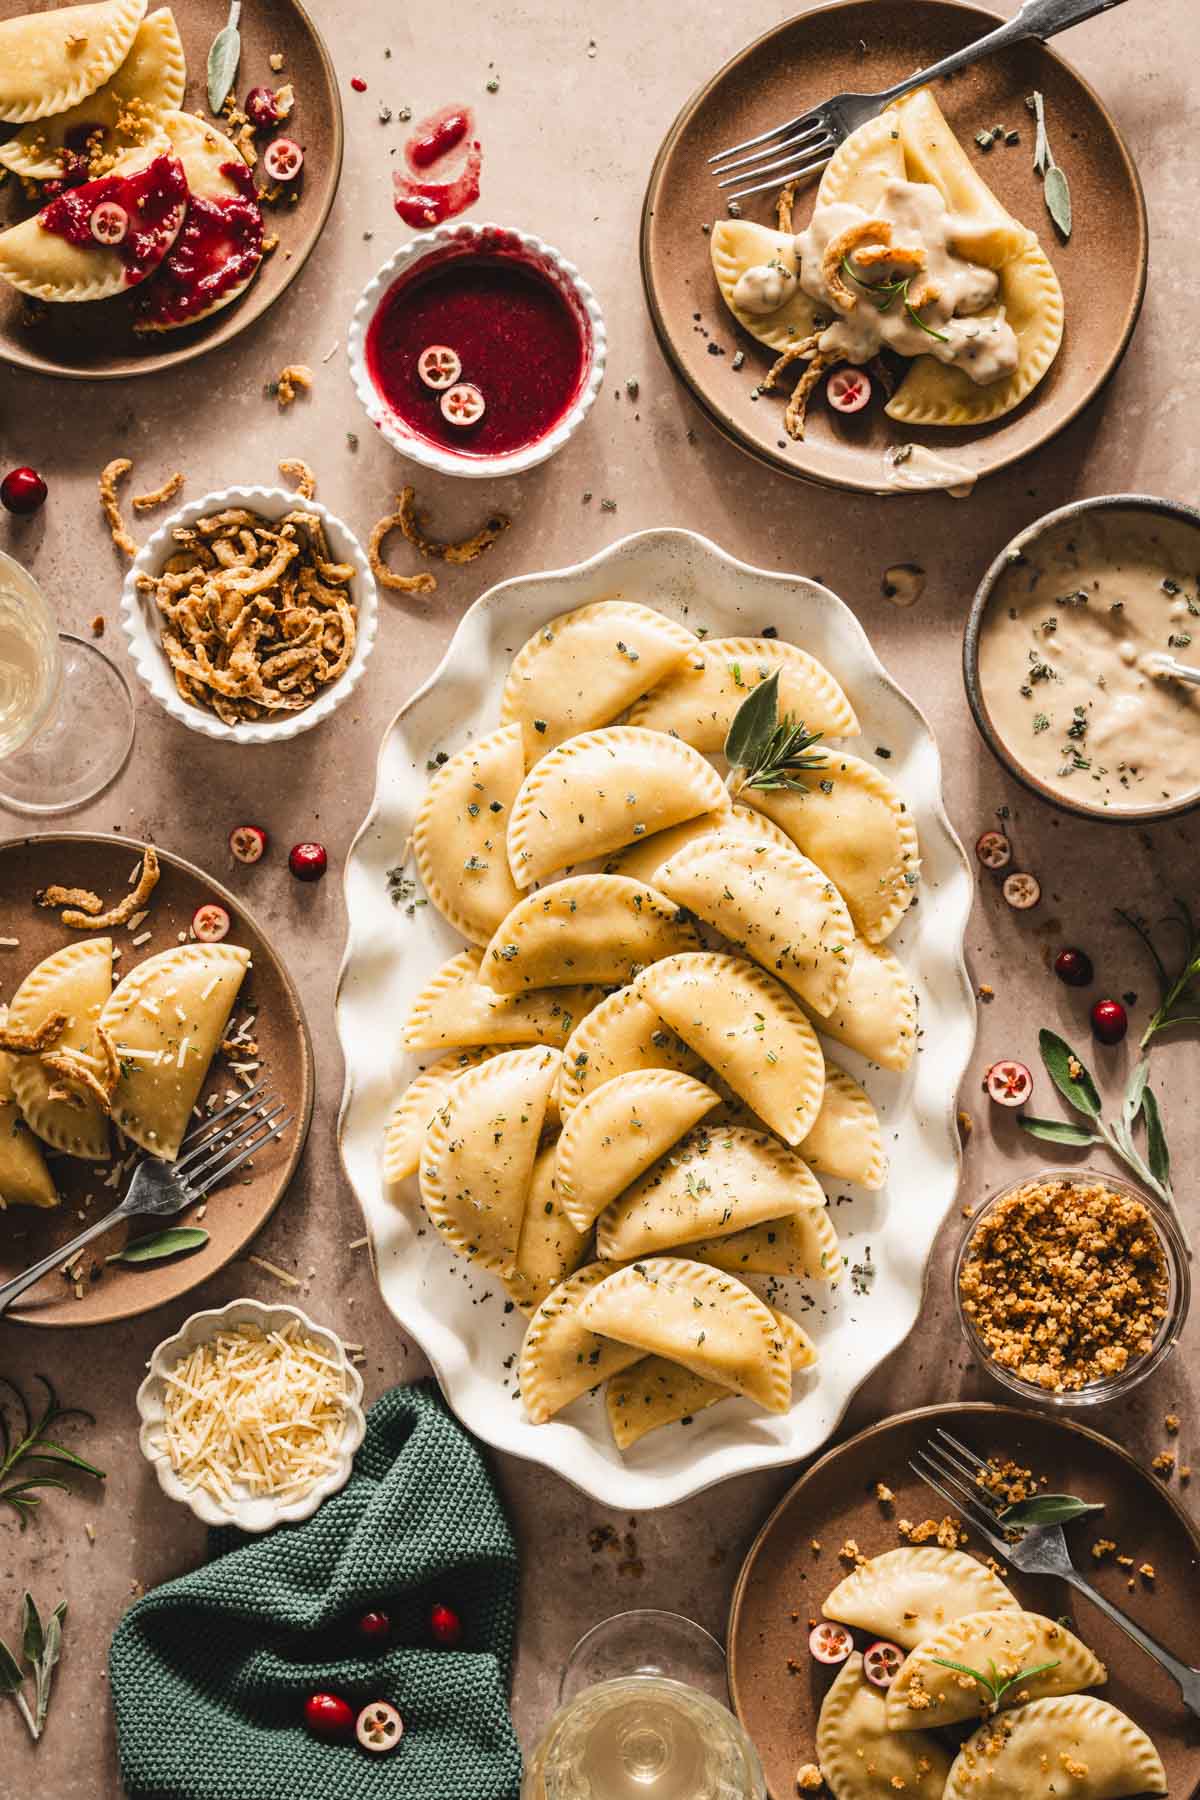
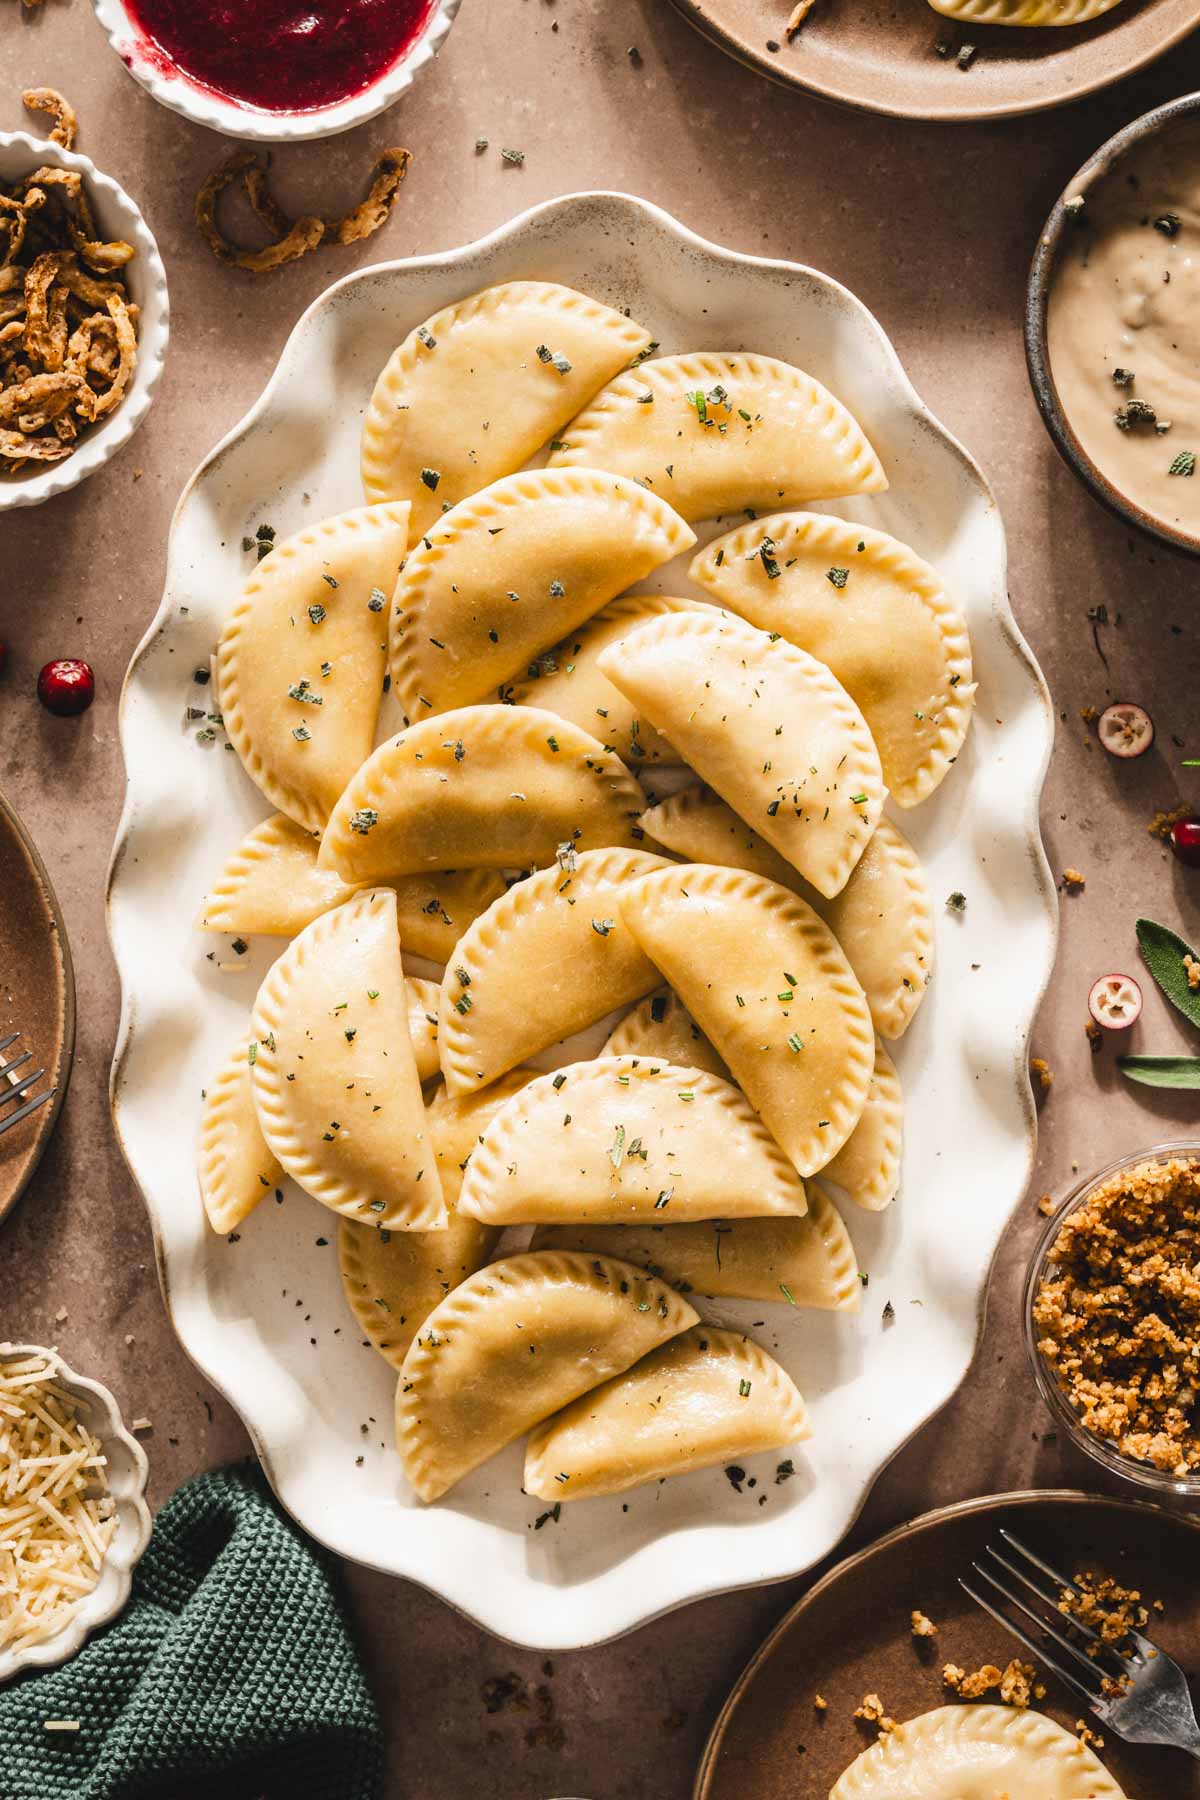
These Turkey-Stuffed Pierogis bring all the flavors of Thanksgiving into a bite-sized package. With tender dumpling dough wrapped around a filling of shredded turkey, herbs, and creamy ricotta cheese, they’re as festive as they are comforting. Serve them with rich sage gravy or a tart Cranberry Sauce to elevate your holiday menu with a Polish-inspired twist.

Why you will love Turkey Stuffed Pierogis
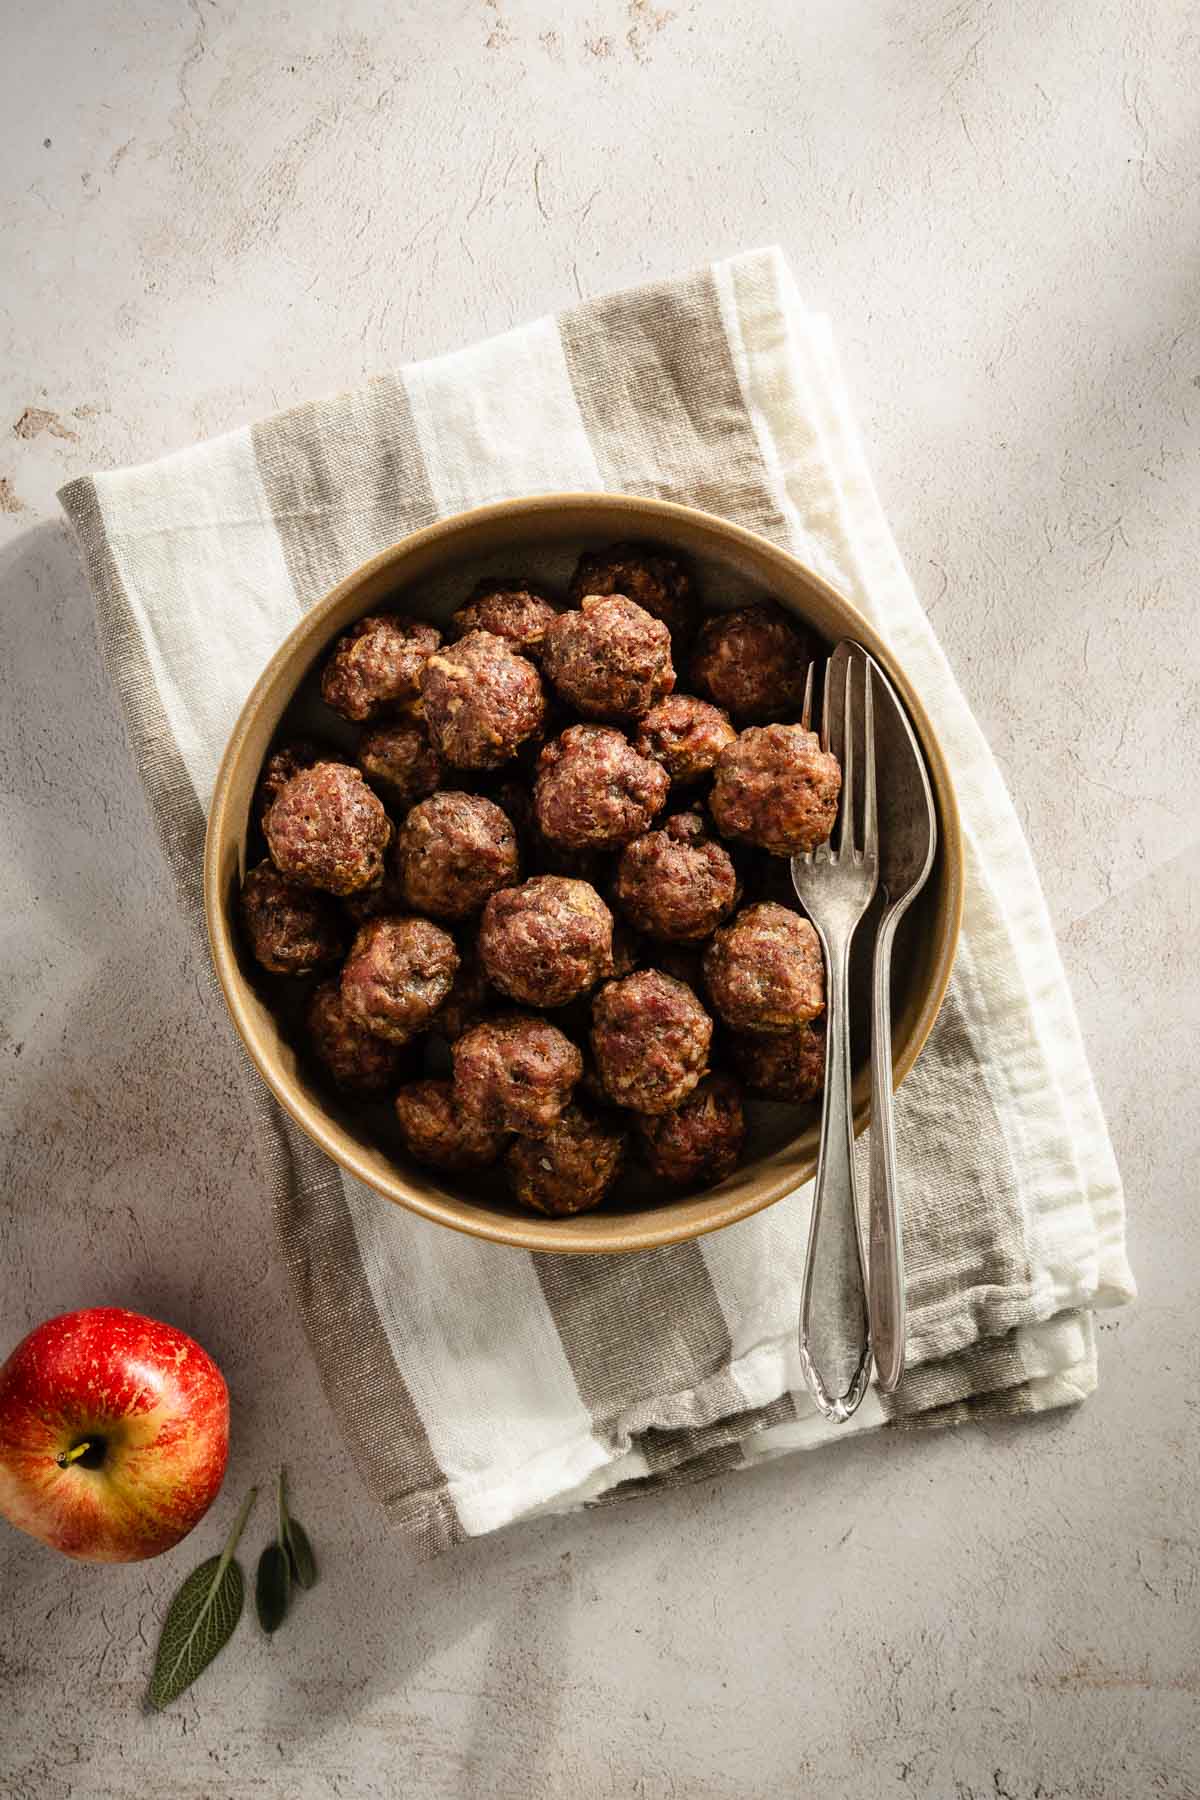
Thanksgiving flavors in every bite – these pierogi are like a mini Thanksgiving dinner! Savory filling made of smoked turkey, flavored with sage and rosemary, screams holiday season. Serve them with a side of cranberry sauce, and you have all the best parts of a Thanksgiving meal.
A unique take on tradition – combining Polish pierogi with Thanksgiving flavors is a creative surprise that’s sure to stand out. It’s a nostalgic nod to classic family dishes while giving guests something totally new to talk about.
Smoky, savory goodness – that smoked turkey takes the flavor to another level. It’s got that warm, woodsy taste that’s rich but still delicate, making each pierogi bite deeply satisfying.
Texture and flavor – the creamy ricotta with shredded turkey, the soft, pillowy dough, and any crunchy toppings like pretzel crumbs or crispy onions. What not to love.
Ingredients, Variations and Substitutions
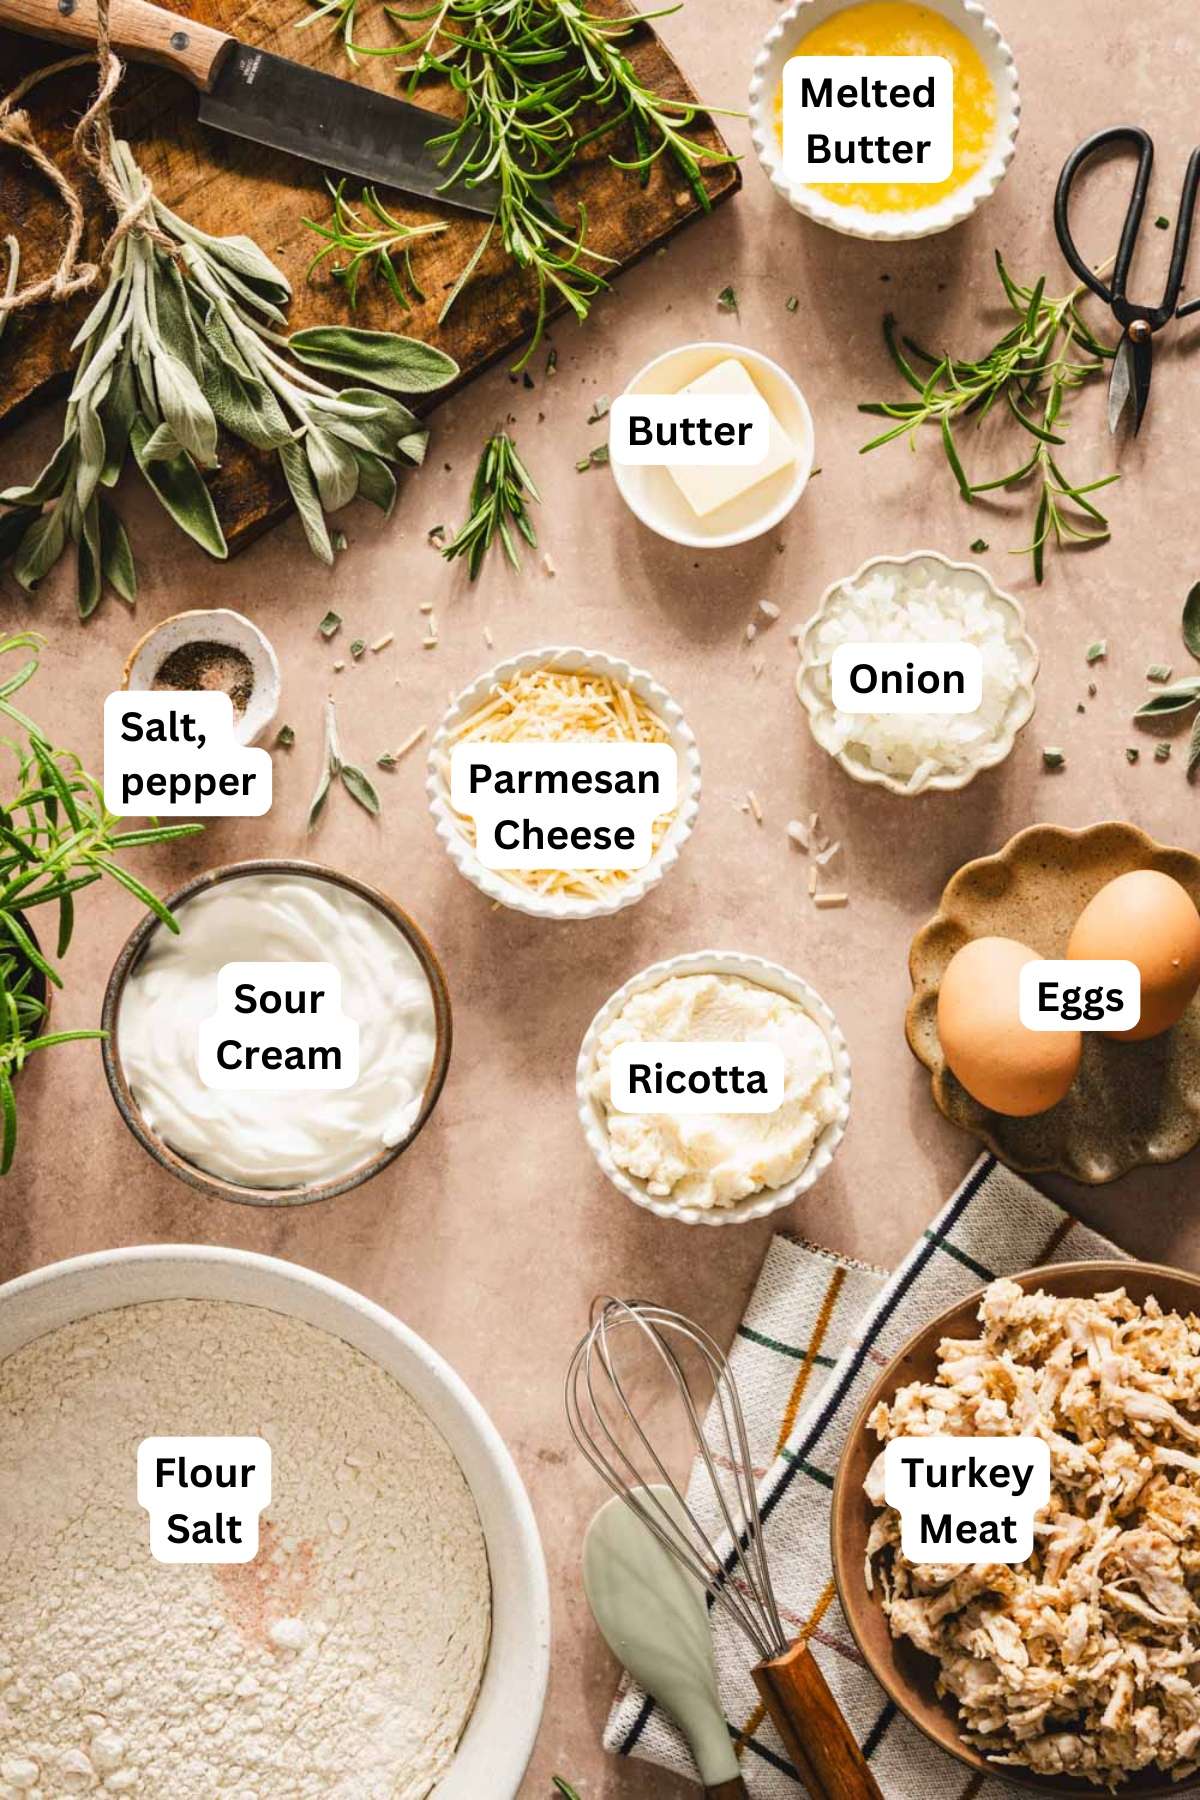
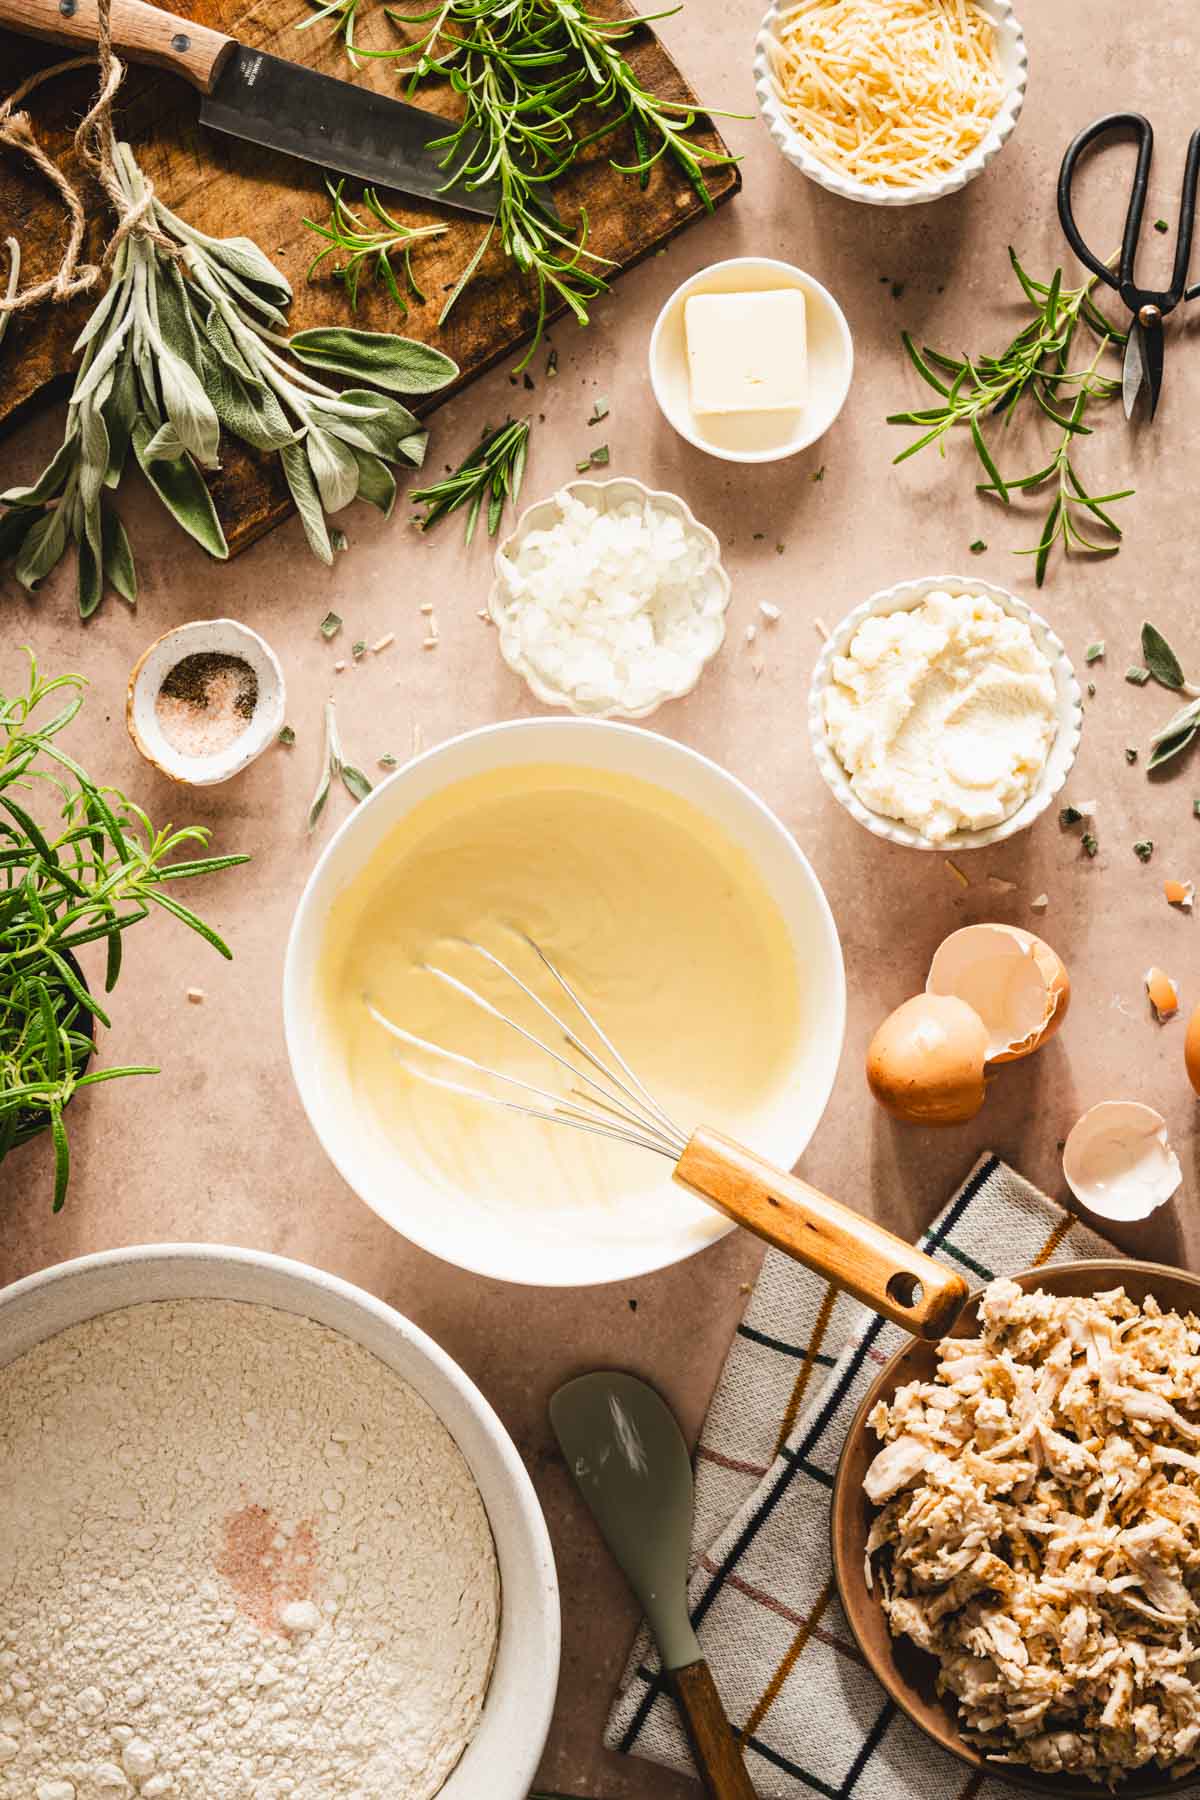
We are using all-purpose flour as the base for the pierogi dough. A mix of sour cream and egg enriches the dough, adding a bit of flavor and giving it a nice elasticity that’s easy to work with. If you don’t have sour cream, swap it with plain Greek yogurt. For a dairy-free option, a splash of non-dairy milk with a teaspoon of lemon juice could stand in, although it’ll be a bit less rich.
Shredded turkey is the star of the pierogi filling. You can also use leftover turkey breast or ground turkey. To bind the filling and to keep it creamy, we add ricotta cheese; it’s mild and blends beautifully with the meat and herbs. If ricotta isn’t available, cottage cheese is a great alternative, though it’ll need a quick whirl in a blender to smooth it out. We are adding Parmesan cheese (Gruyère or even cheddar cheese) for a deeper flavor and texture. It brings that nutty, savory quality that complements the turkey and herbs.
We are using fresh sage and rosemary to infuse each pierogi with Thanksgiving flavors. Fresh herbs provide a delicate, aromatic touch, but dried sage and rosemary can work too. Reduce the quantity to avoid an overly intense flavor. If you’re feeling creative, a hint of thyme or marjoram could add even more dimension, giving these pierogi a complex, layered taste. Salt and black pepper round out the filling. You can also use garlic powder or nutritional yeast to elevate the flavor.
Equipment you will need
- Mixing Bowl
- Rolling Pin
- Sharp Knife or Dough Cutter
- 3-inch Round Cutter
- Spoon or Small Scoop
- Fork or pierogi press
- Large Pot
- Slotted Spoon
- Measuring cups and spoons
- Non-stick frying pan or Cast Iron Skillet
- Stand mixer (optional)
Top Tips
Keep the dough soft but manageable – when mixing the dough, aim for a soft texture that’s easy to roll out but not sticky. Adding sour cream or yogurt helps keep it tender. If the dough is too sticky, sprinkle a little extra flour as you roll it out.
Don’t overfill – with pierogi, less is more when it comes to filling! Aim for about a teaspoon or so of the filling per piece. If you’re using shredded turkey, make sure it’s finely shredded for easier sealing.
Use fresh herbs if possible – fresh sage and rosemary bring out the Thanksgiving flavor in the filling. Dried herbs work in a pinch, but they’re more concentrated, so use about half the amount and taste as you go to avoid overpowering the filling.
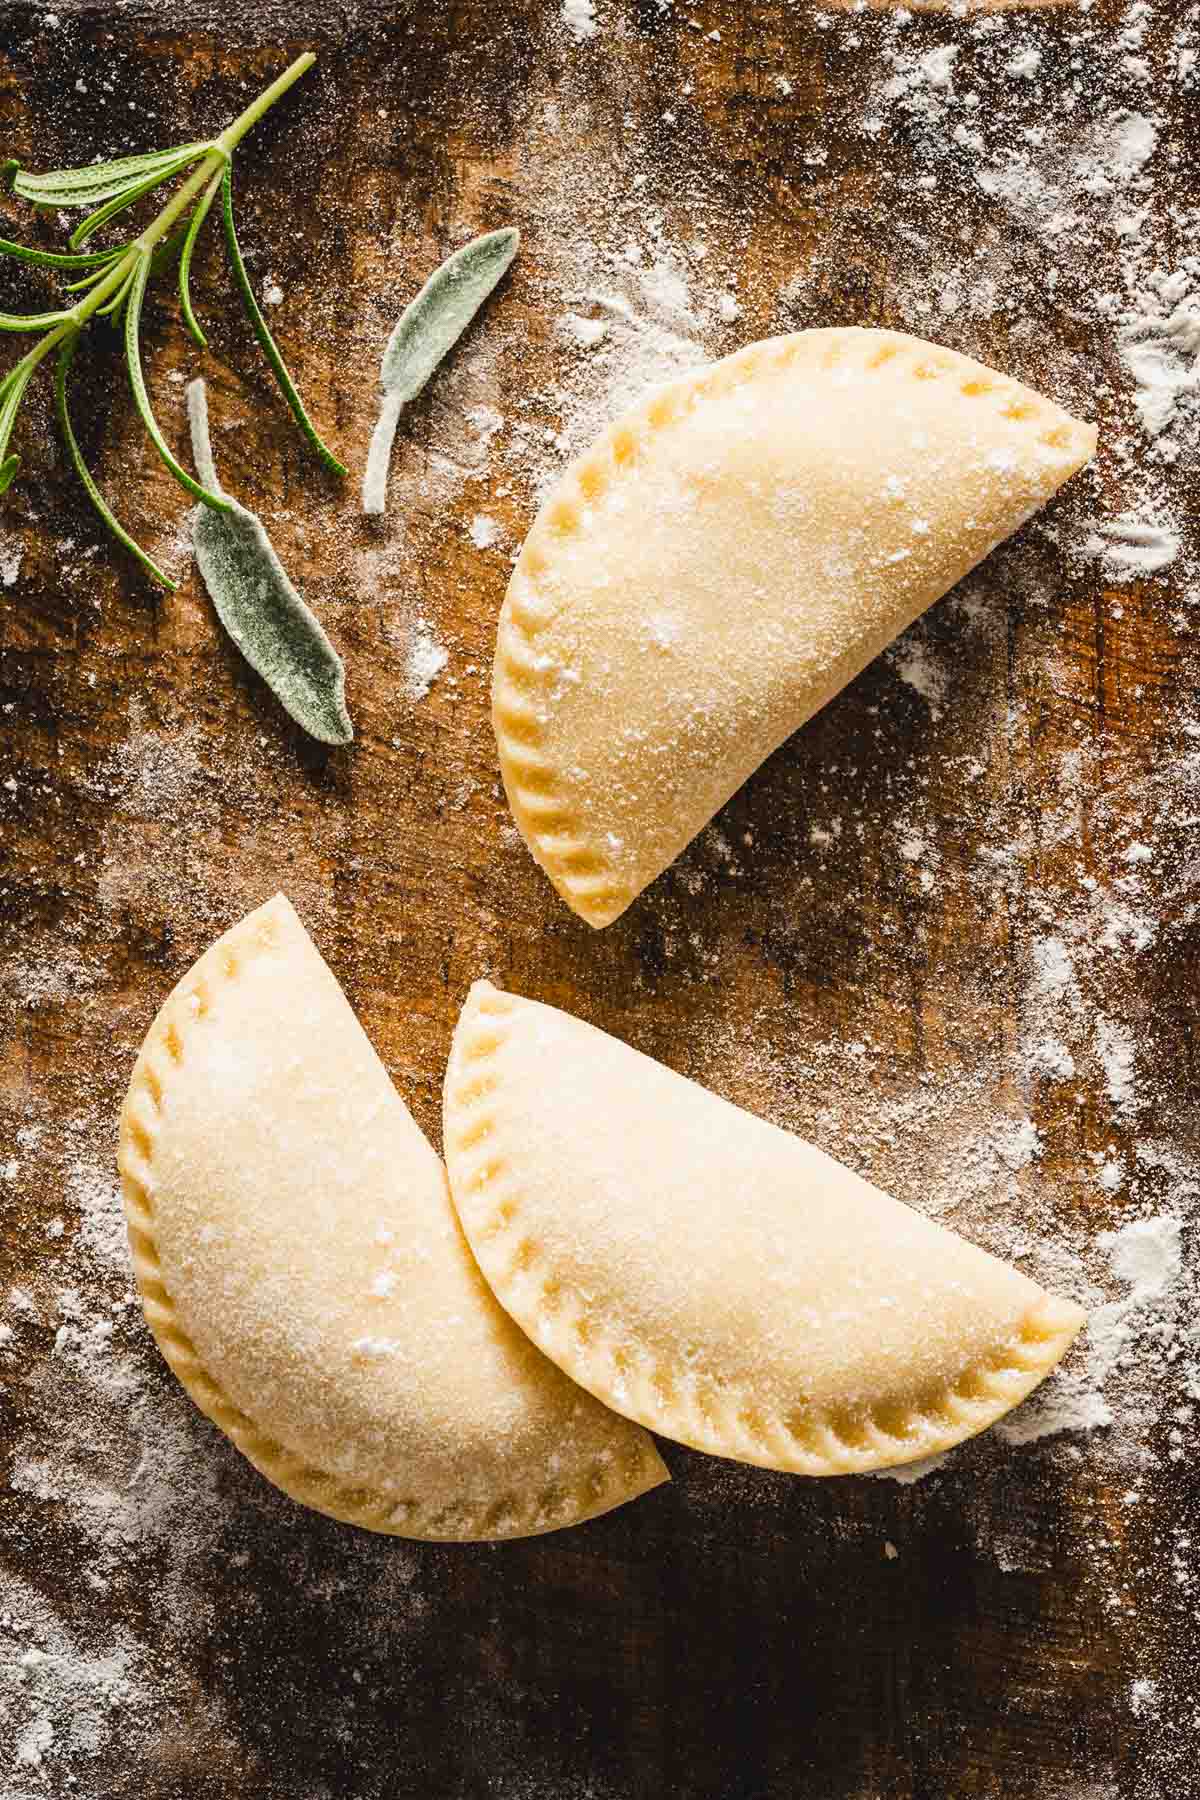
Seal well to prevent leaks – after folding the dough over the filling, press firmly along the edges, then crimp with a fork (or use a pierogi press) to make a tight seal. A light dab of water around the edge can also help keep everything sealed up while boiling.
Boil, then (optionally) sauté – boiling alone is perfect for classic pierogi. If you like them crispier, quickly pan-fry them in butter or olive oil until golden brown on each side. This will add a bit of extra flavor and texture.
Step-by-step instructions
- In a large mixing bowl, combine flour and salt.
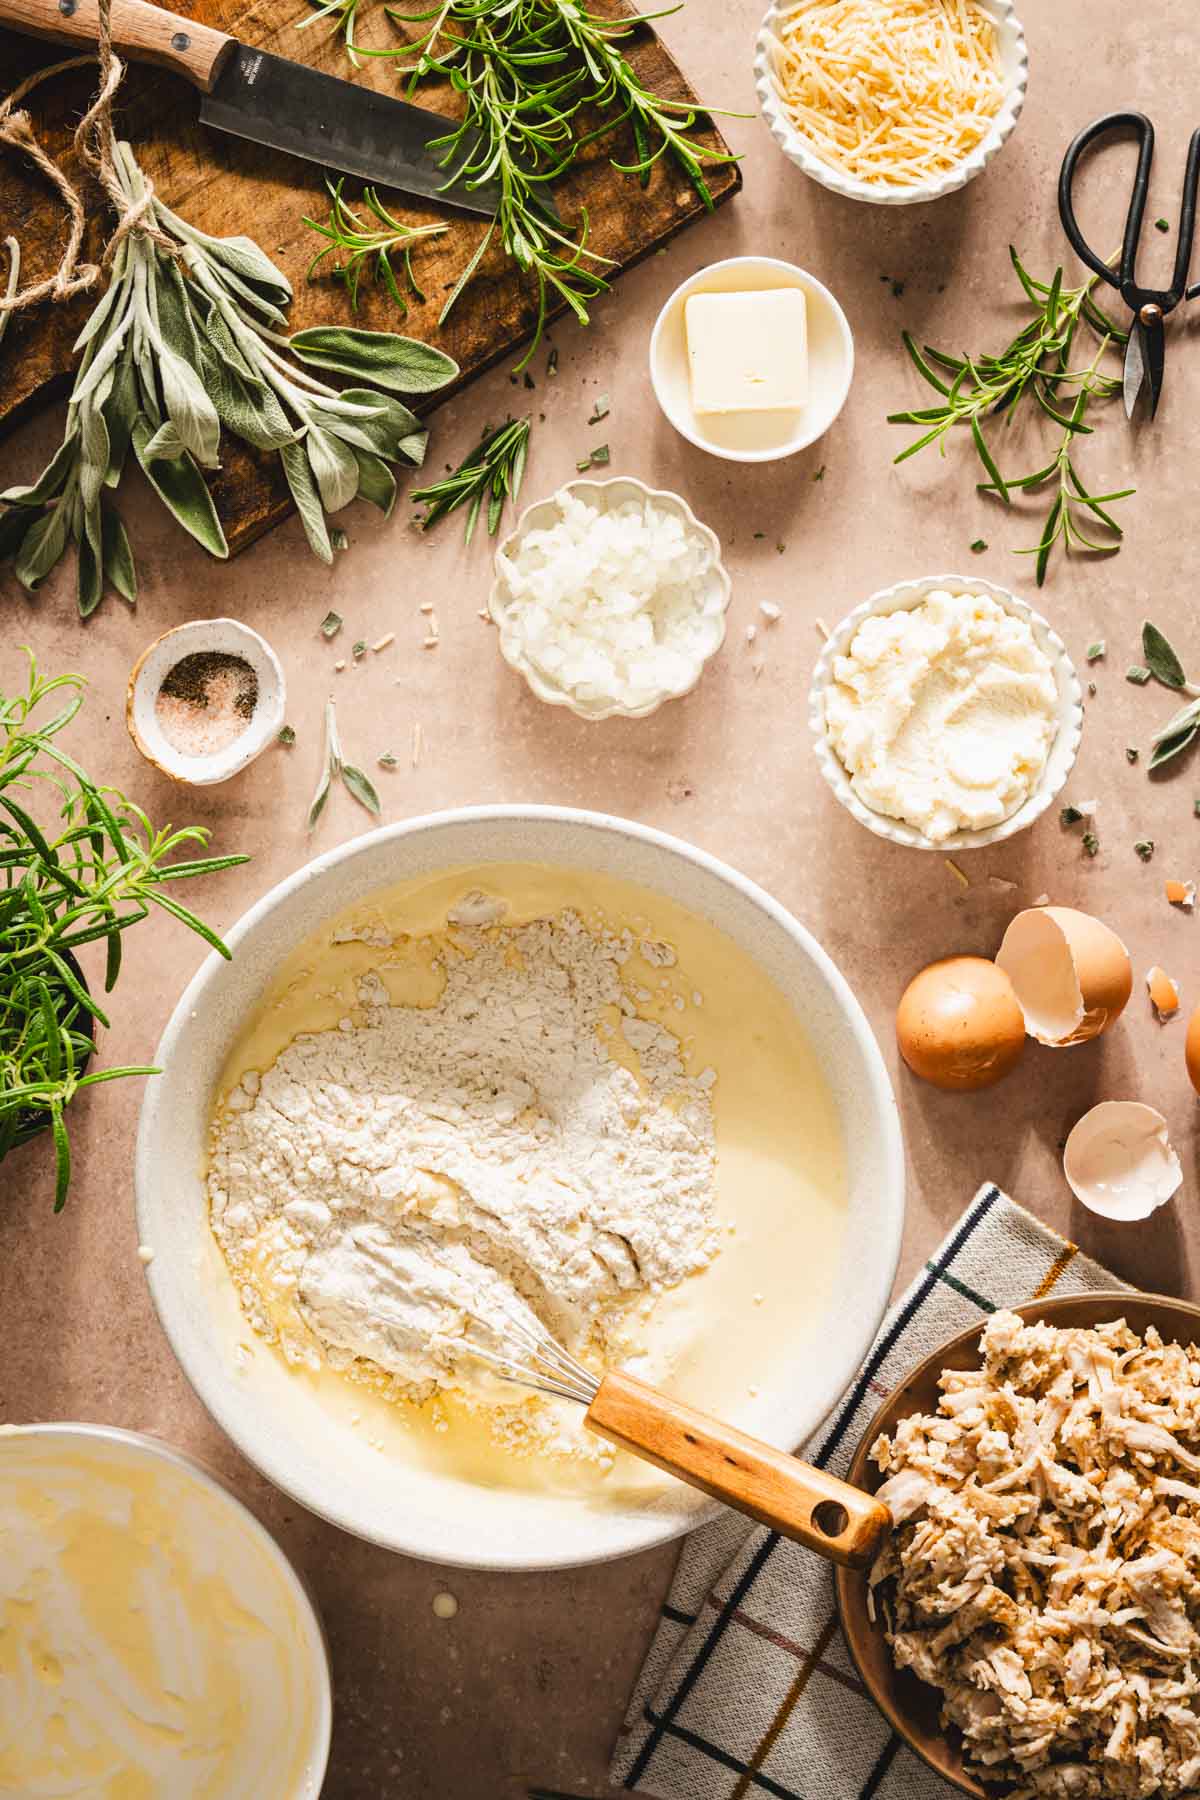
- Whisk together sour cream and egg in a separate small bowl. Pour this into the flour mixture.
- Stir until the dough comes together, then knead it on a floured surface for about 5 minutes until smooth and elastic. (If it’s sticky, add a bit more flour, 1 tablespoon at a time.)
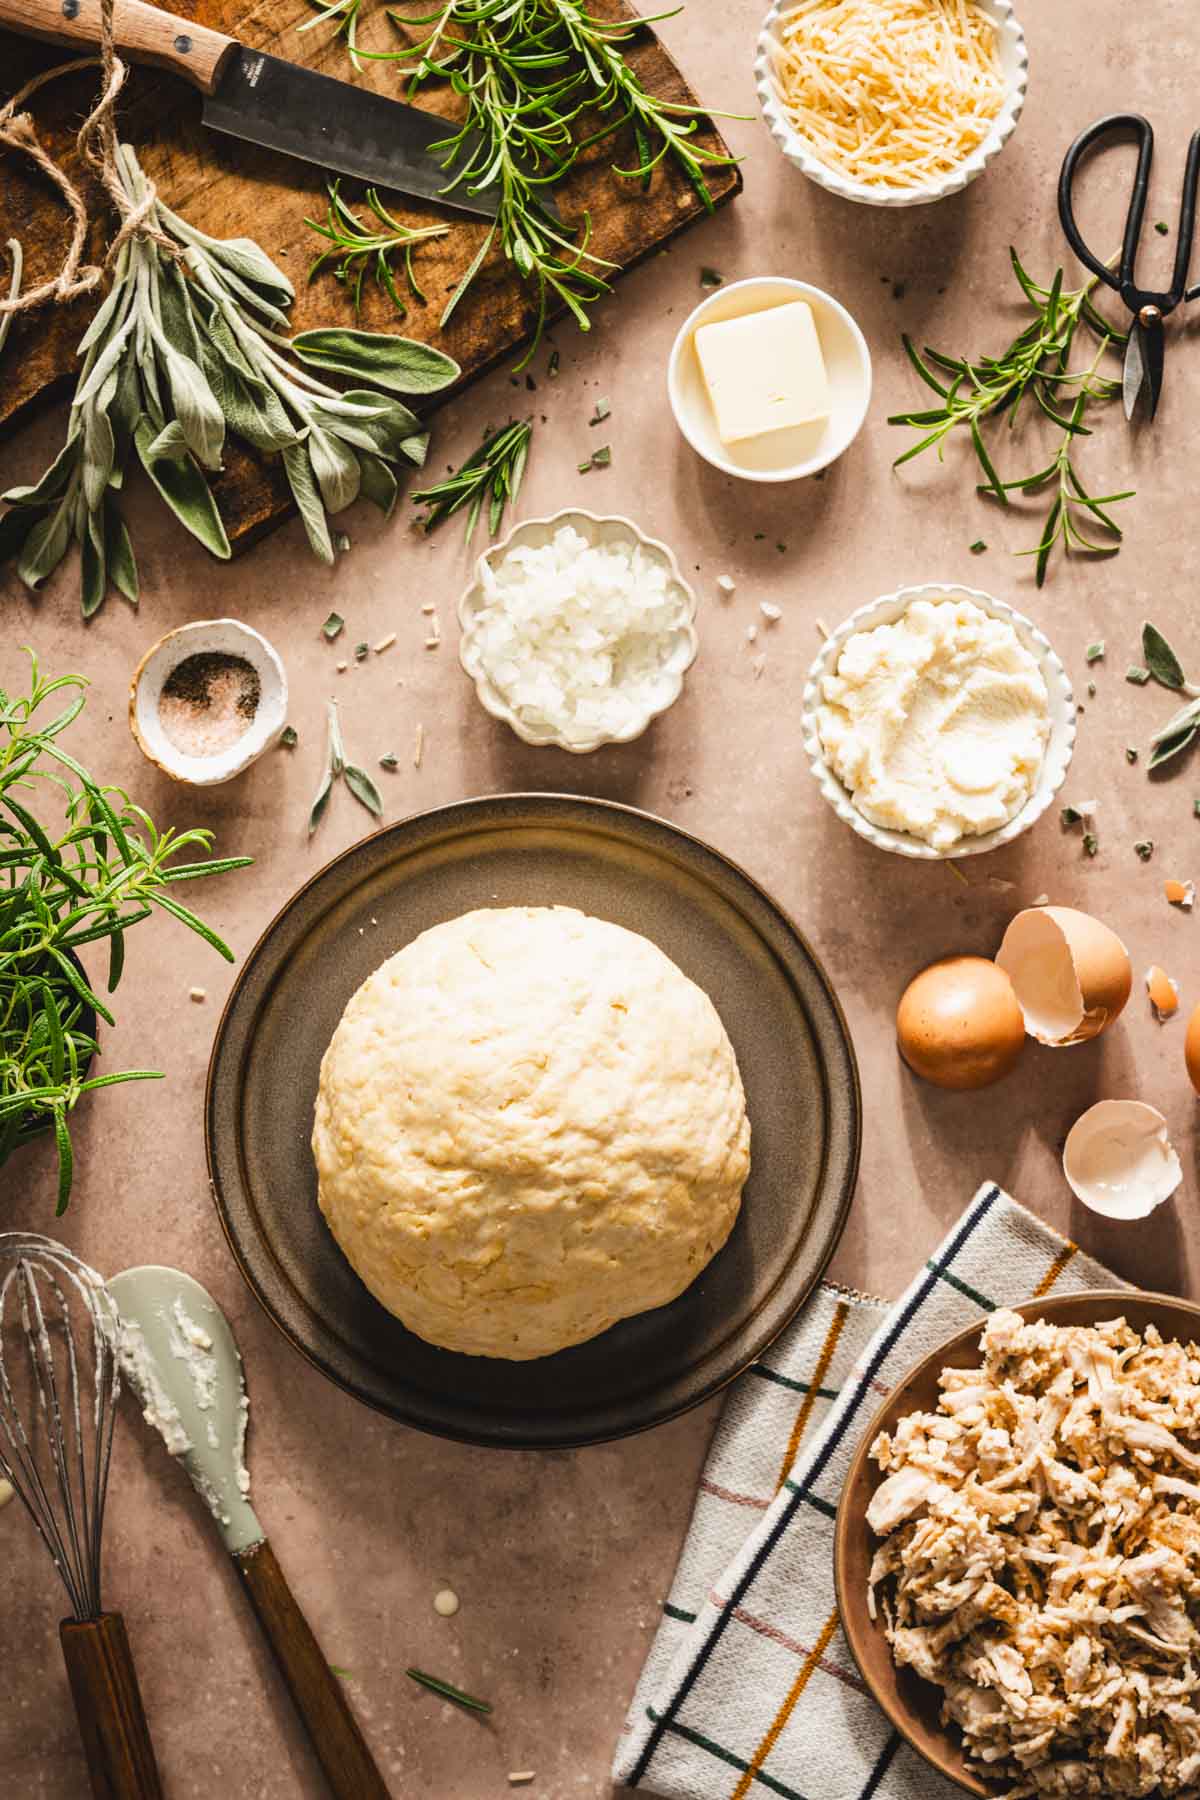
- Wrap the dough in plastic wrap and let it rest at room temperature for at least 30 minutes.
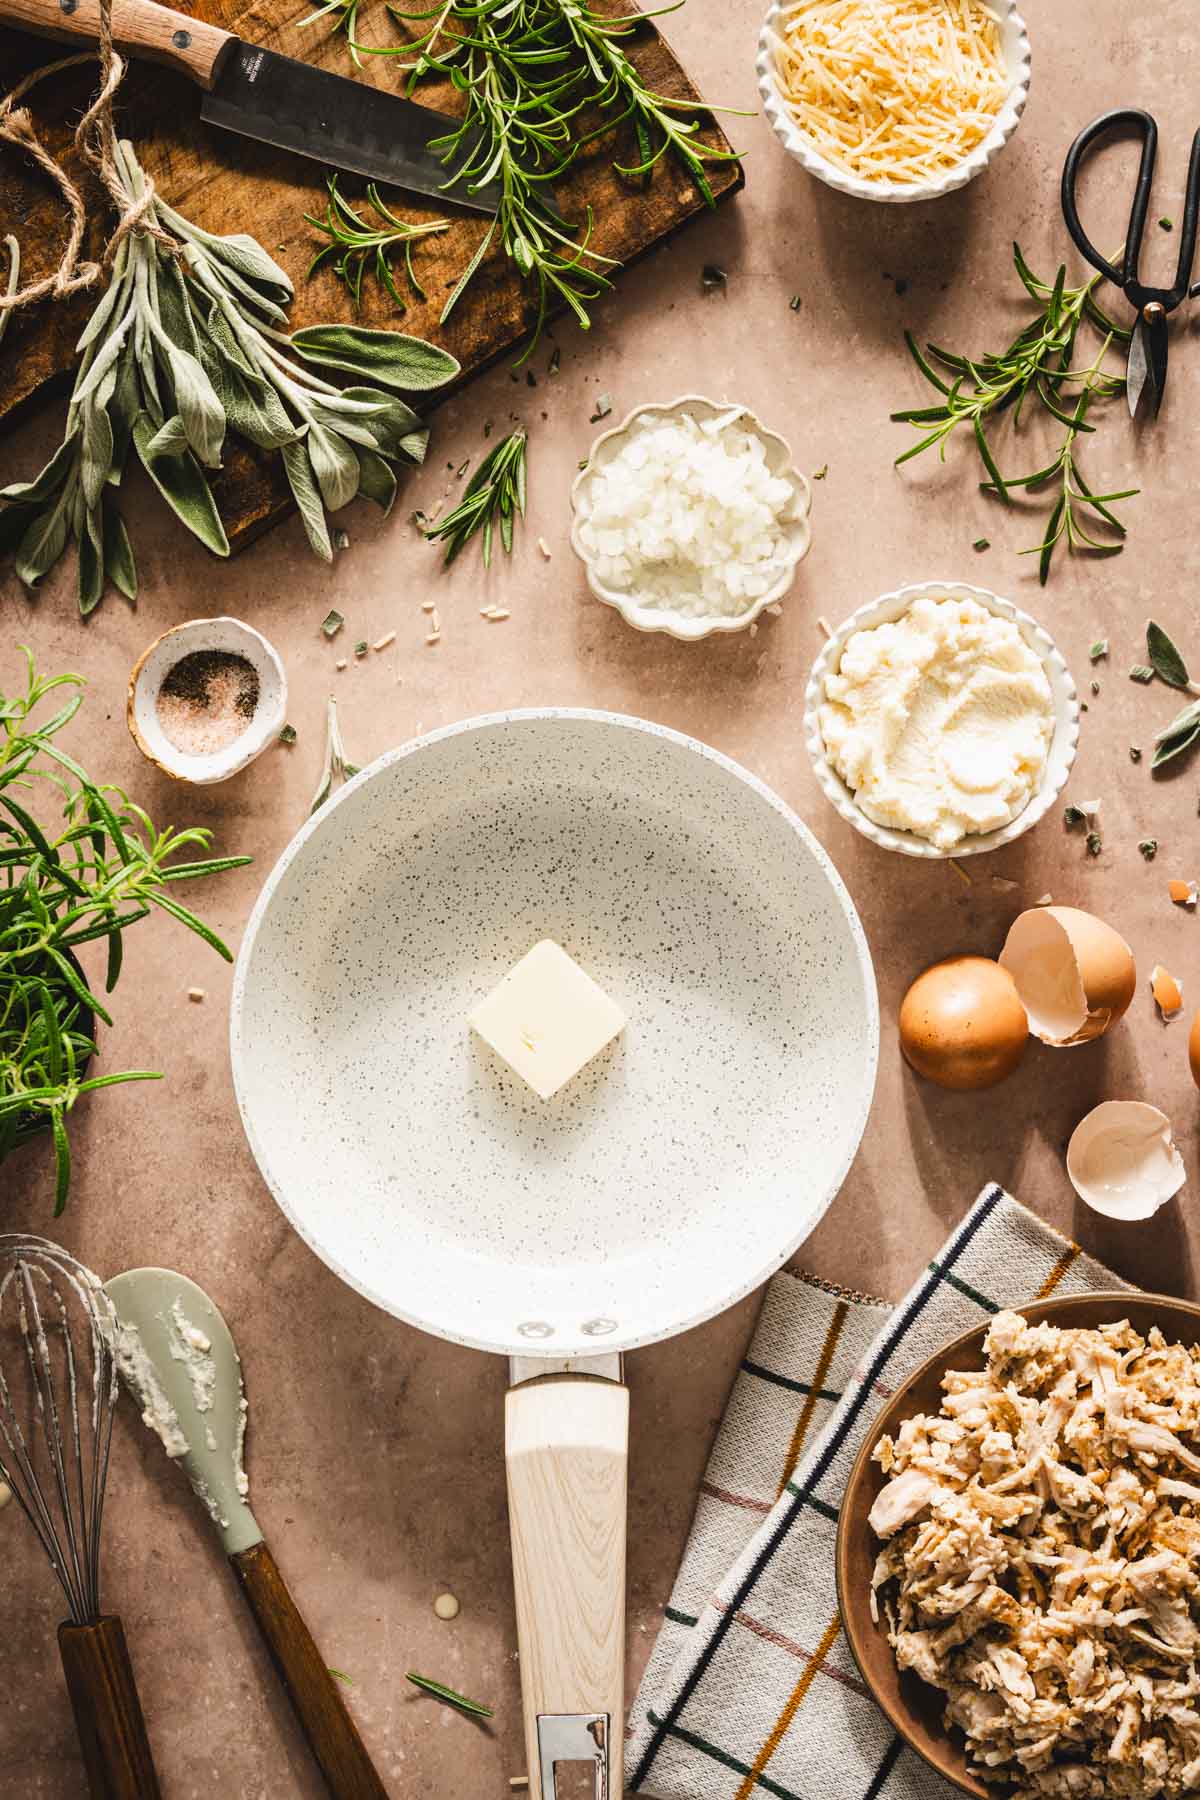
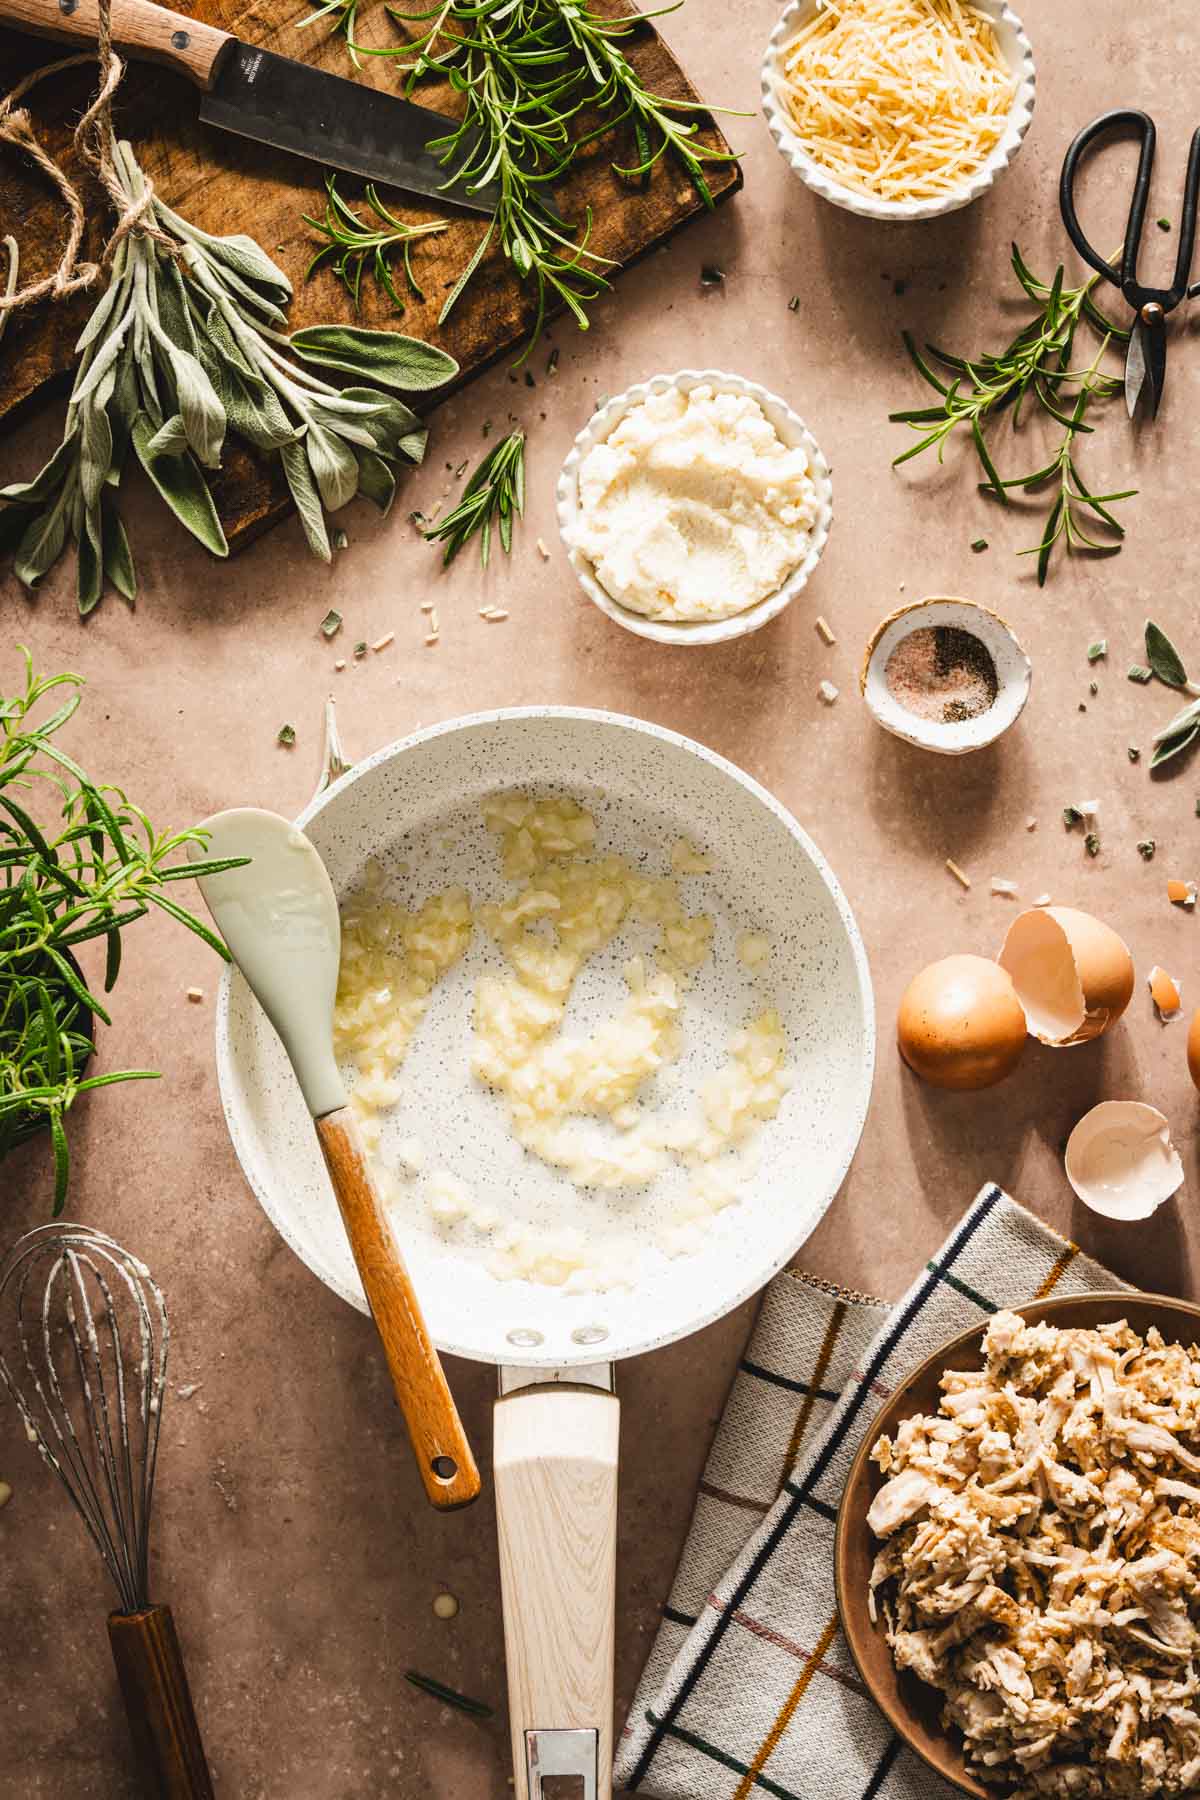
- Heat one tablespoon of butter in a skillet over medium heat. Add a finely chopped small onion and cook until softened and translucent, for about 3–4 minutes. Remove from heat and let cool slightly.

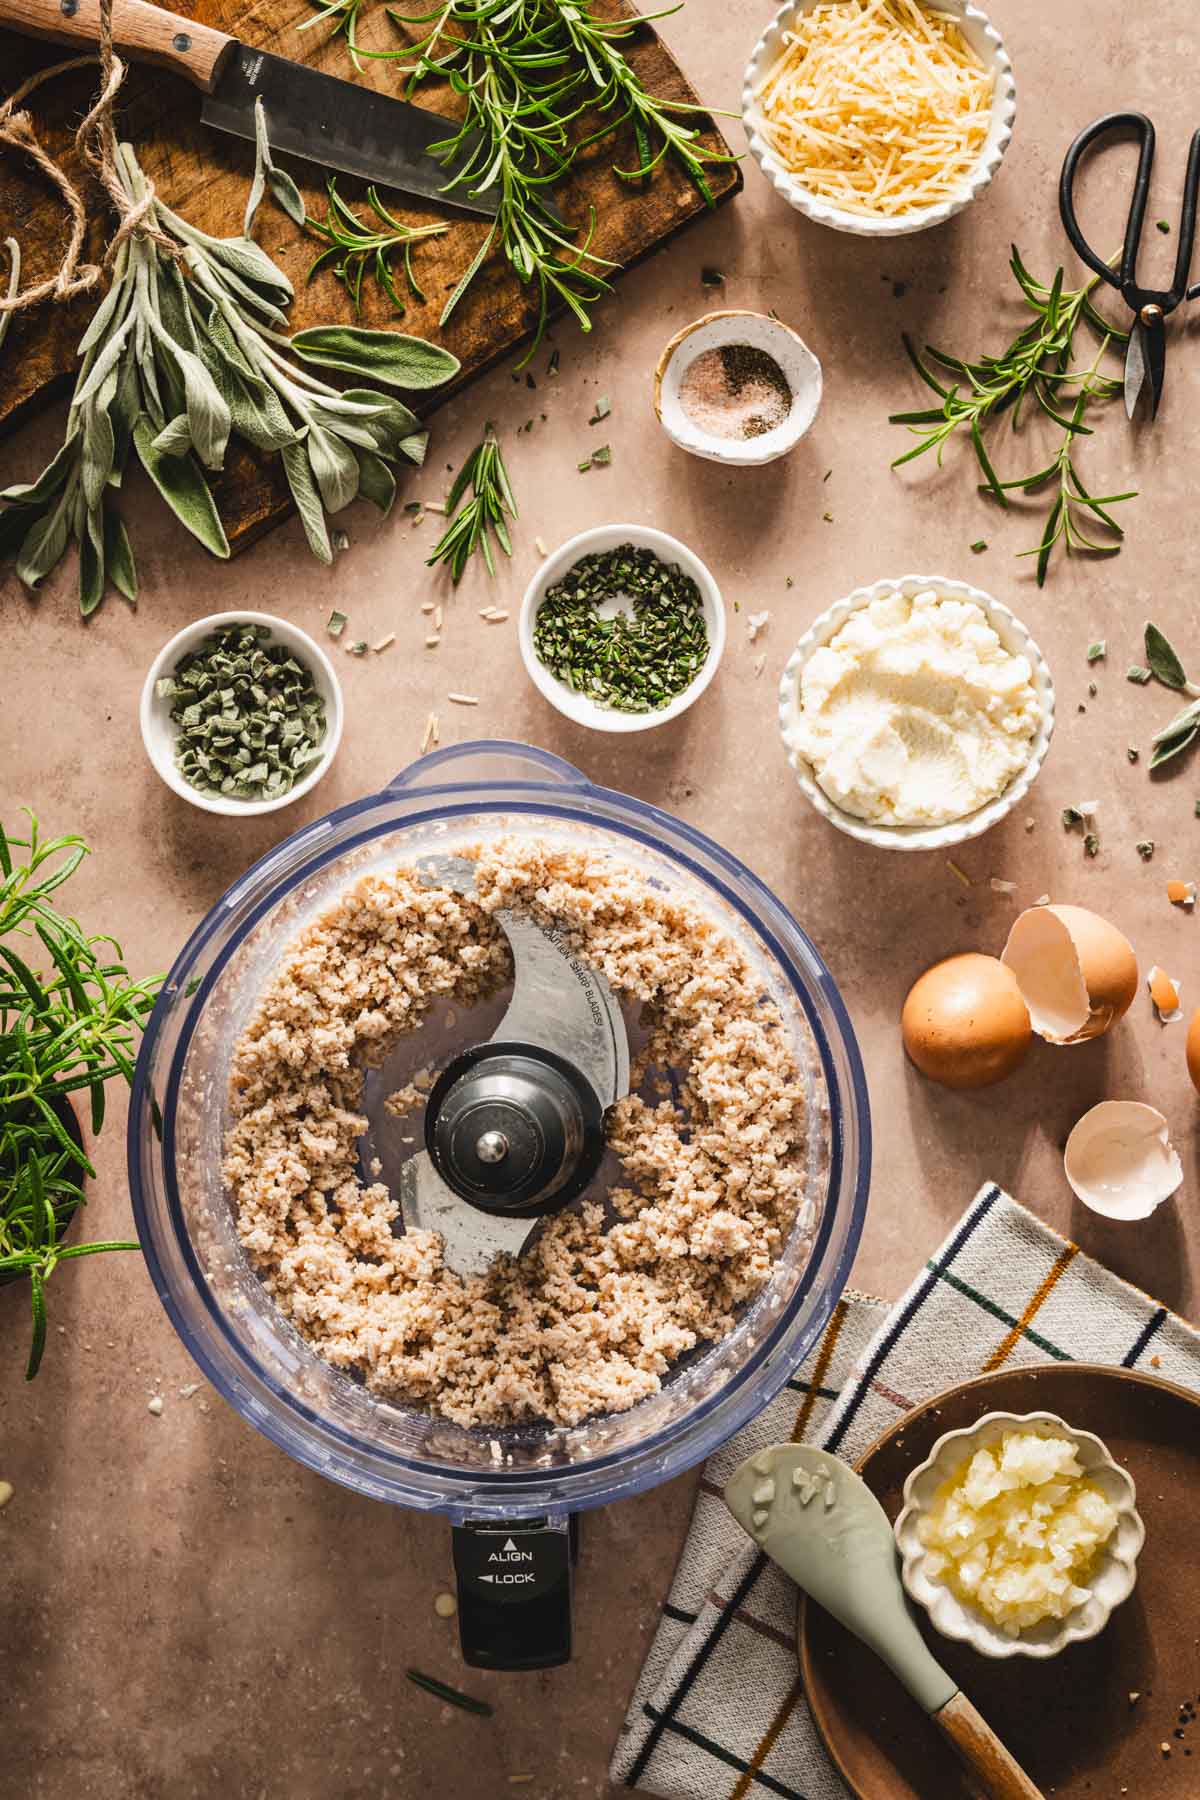
- Place shredded turkey into a food processor and pulse briefly to make it finer and smoother. Avoid over-processing; you want it soft but not a paste.
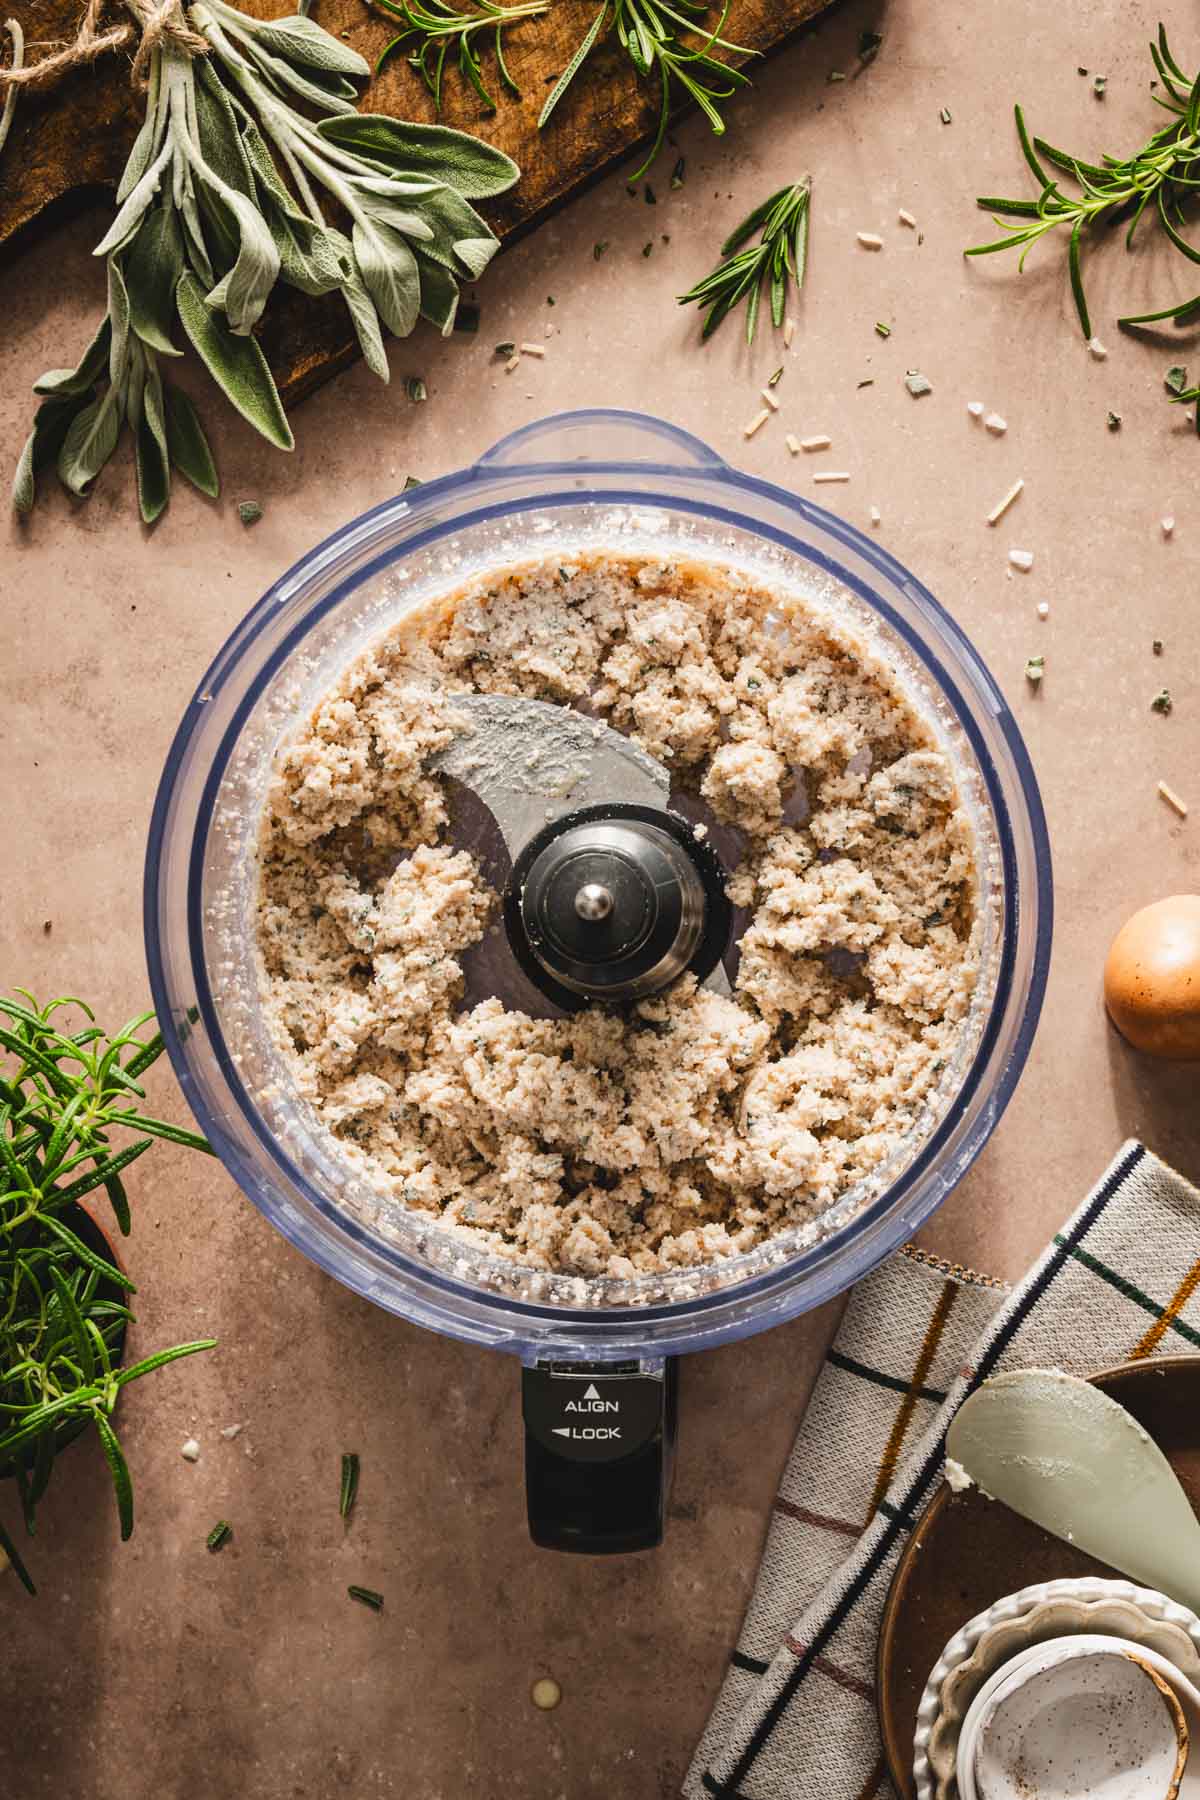
- Add the ricotta, herbs, parmesan cheese, cooked onion, and salt and pepper to the turkey meat, and pulse a few more times to mix the ingredients.
- Transfer the processed turkey filling to a large bowl. Taste and adjust the seasoning if needed.

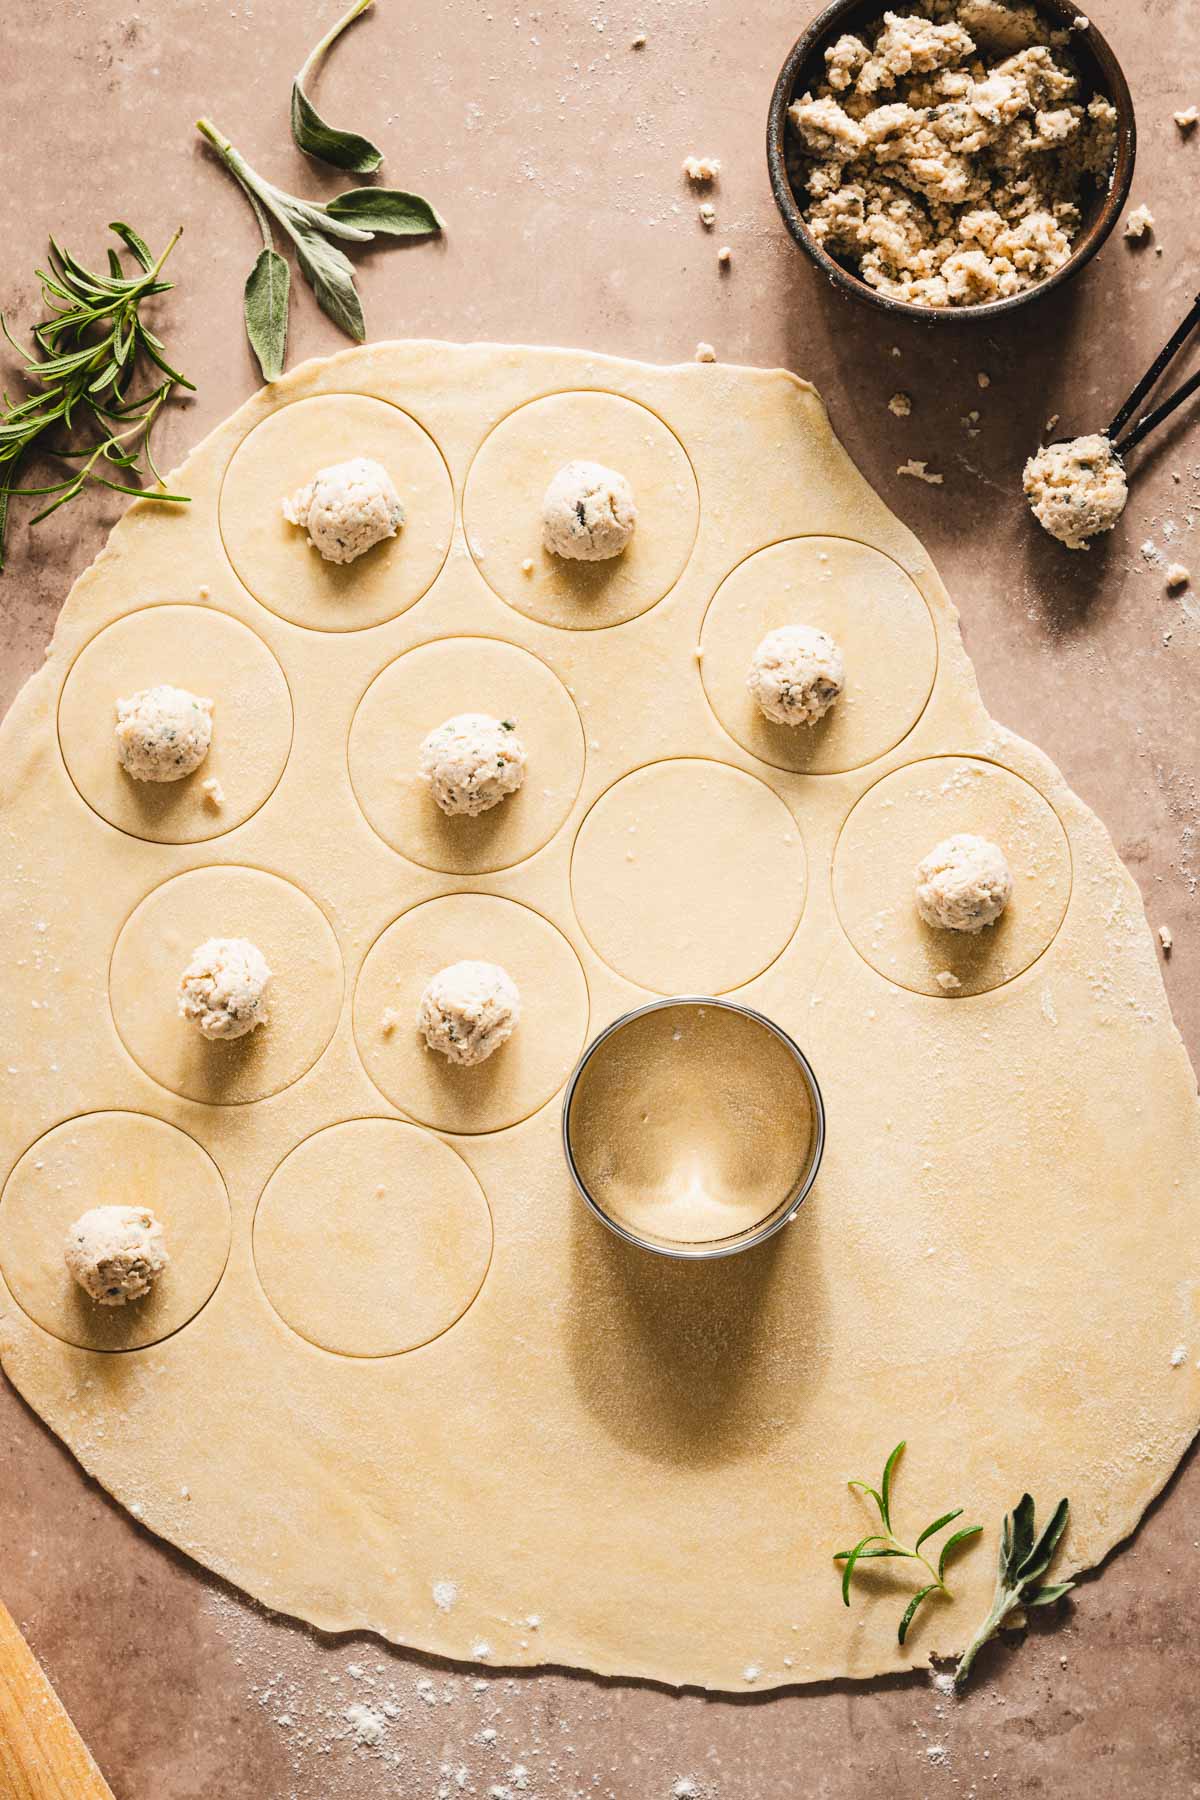
- Roll out the rested dough on a lightly floured surface until it’s about 1/8 inch thick.
- Cut out as many circles as possible using a 3-inch round cutter or the rim of a glass. Gather the scraps, re-roll, and cut additional circles until all the dough is used.
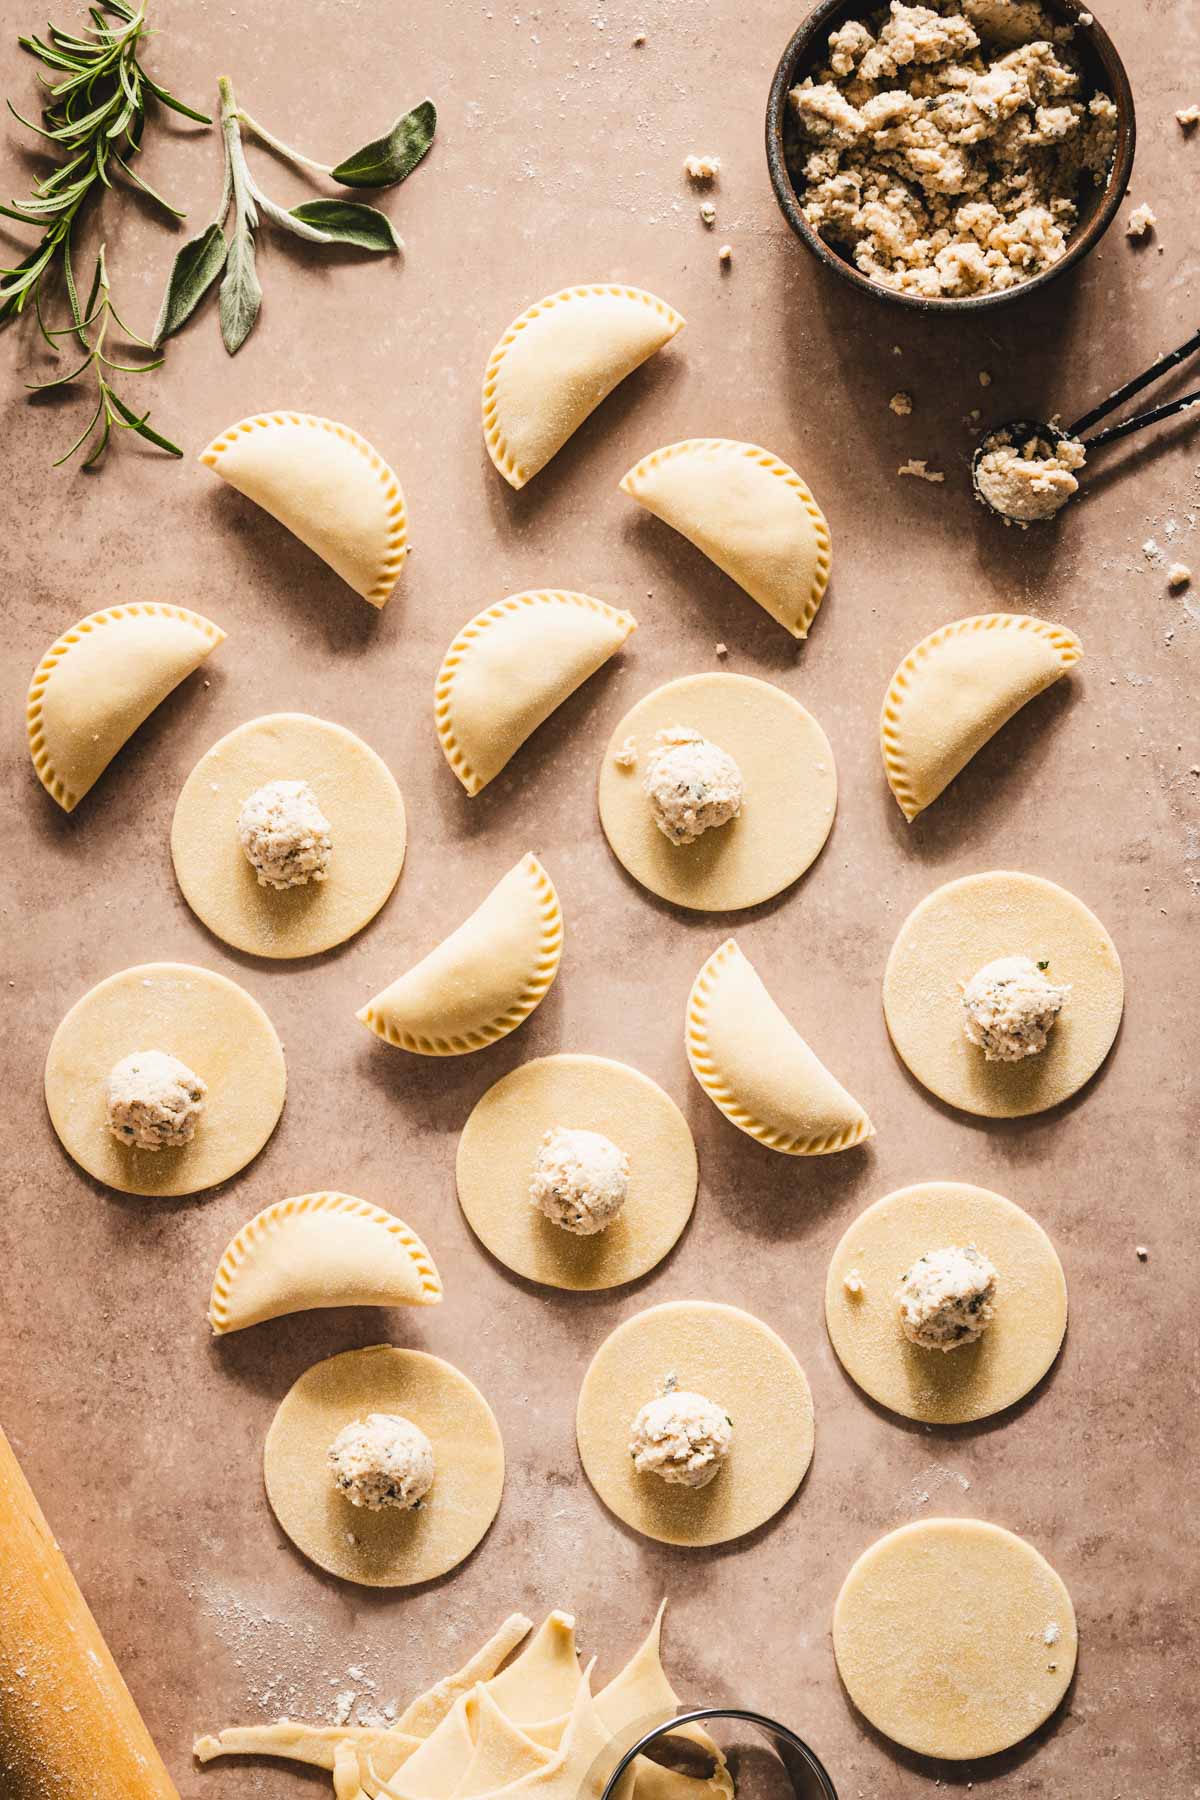
- Place about one teaspoon of the turkey filling in the center of each dough circle.
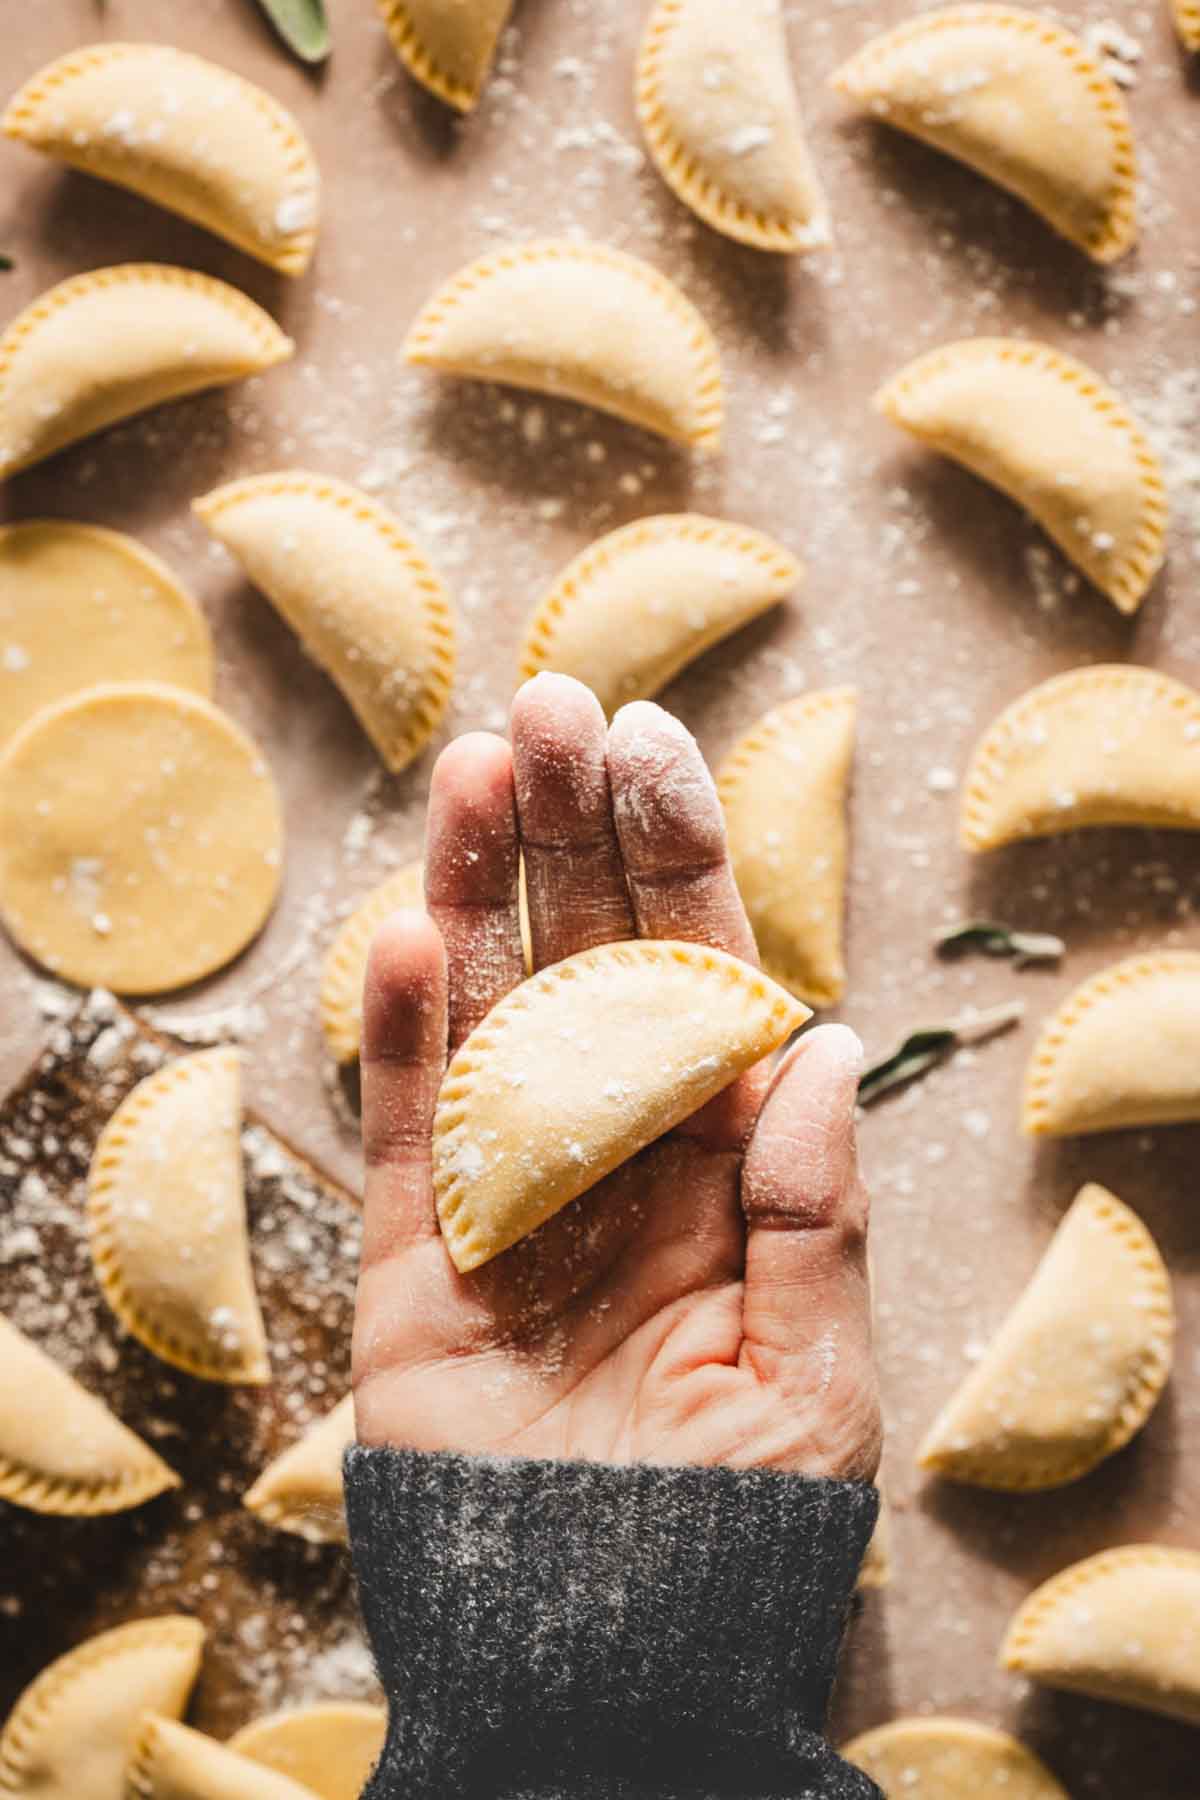
- Lightly moisten the edge of each circle with a dab of water, then fold it over to form a half-moon shape.
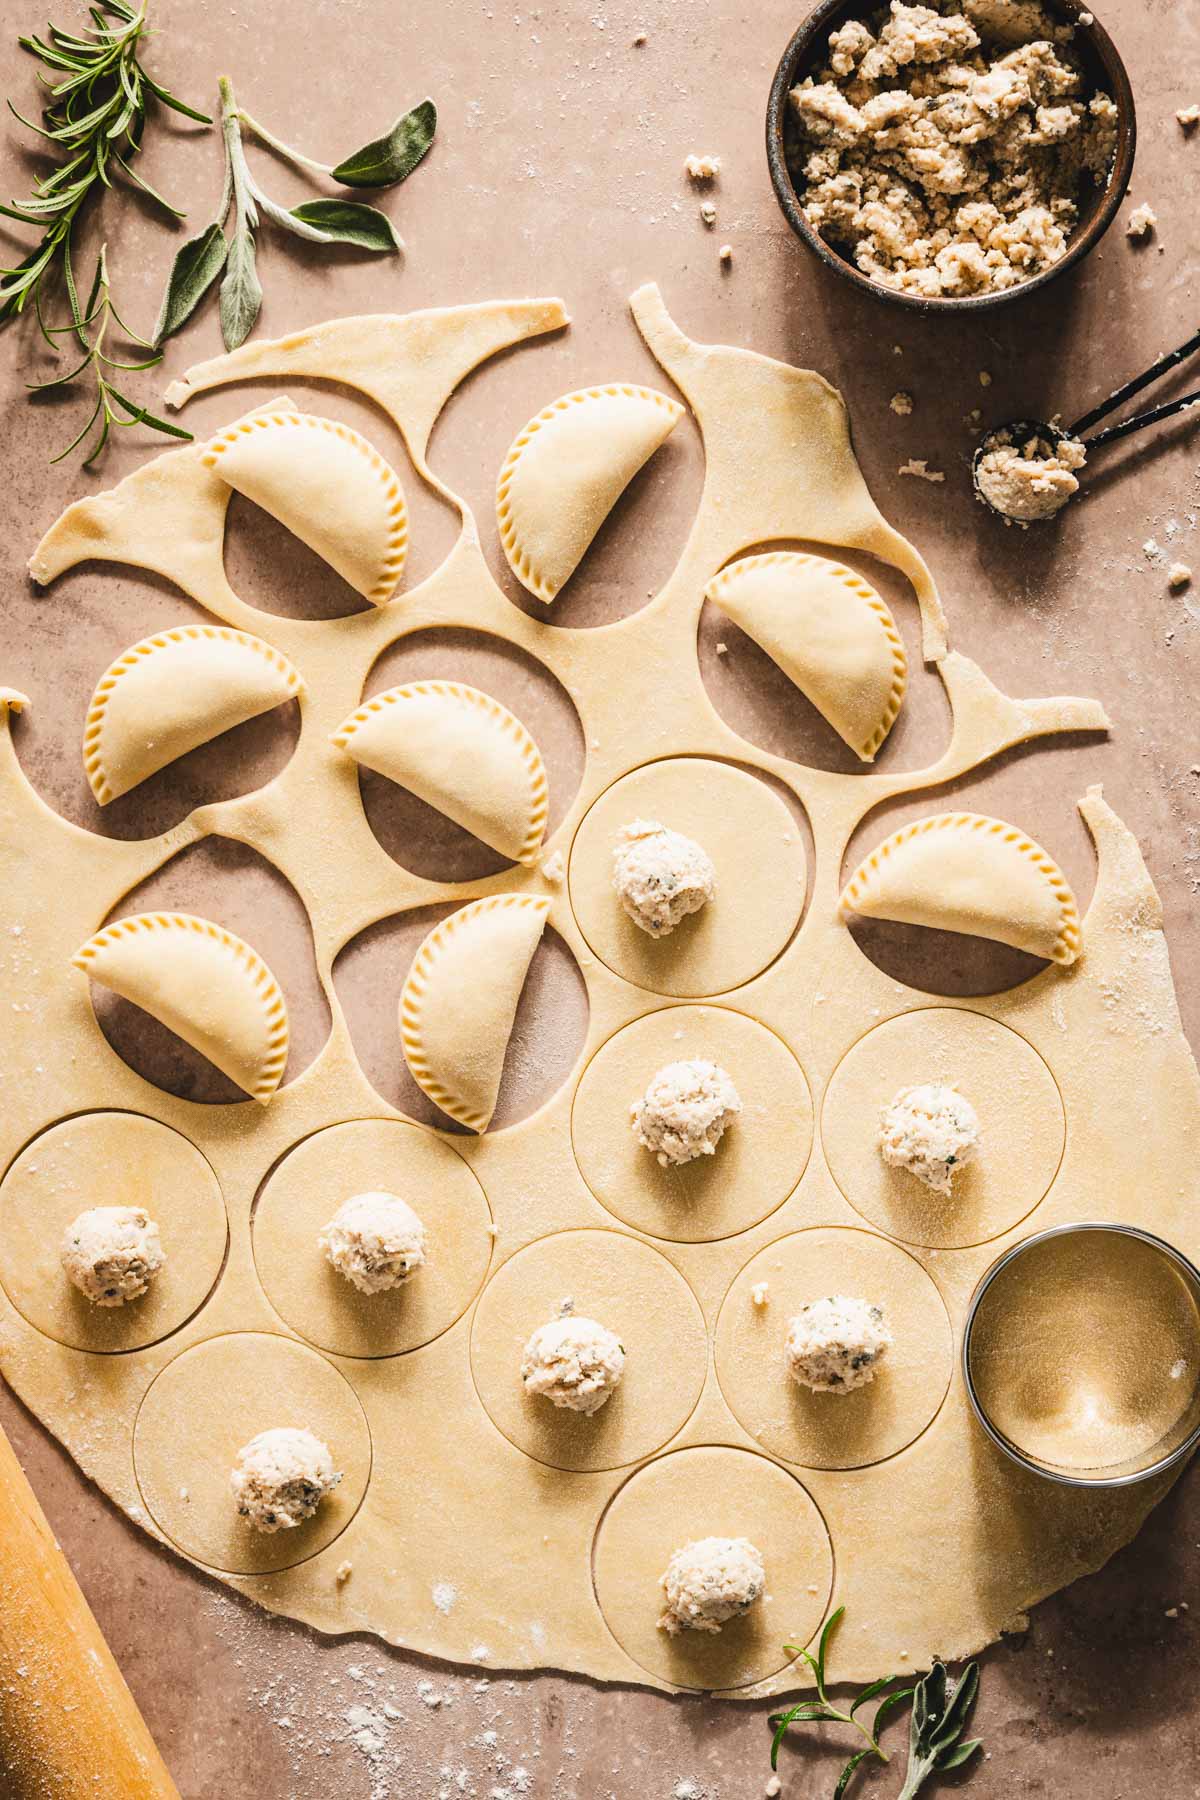

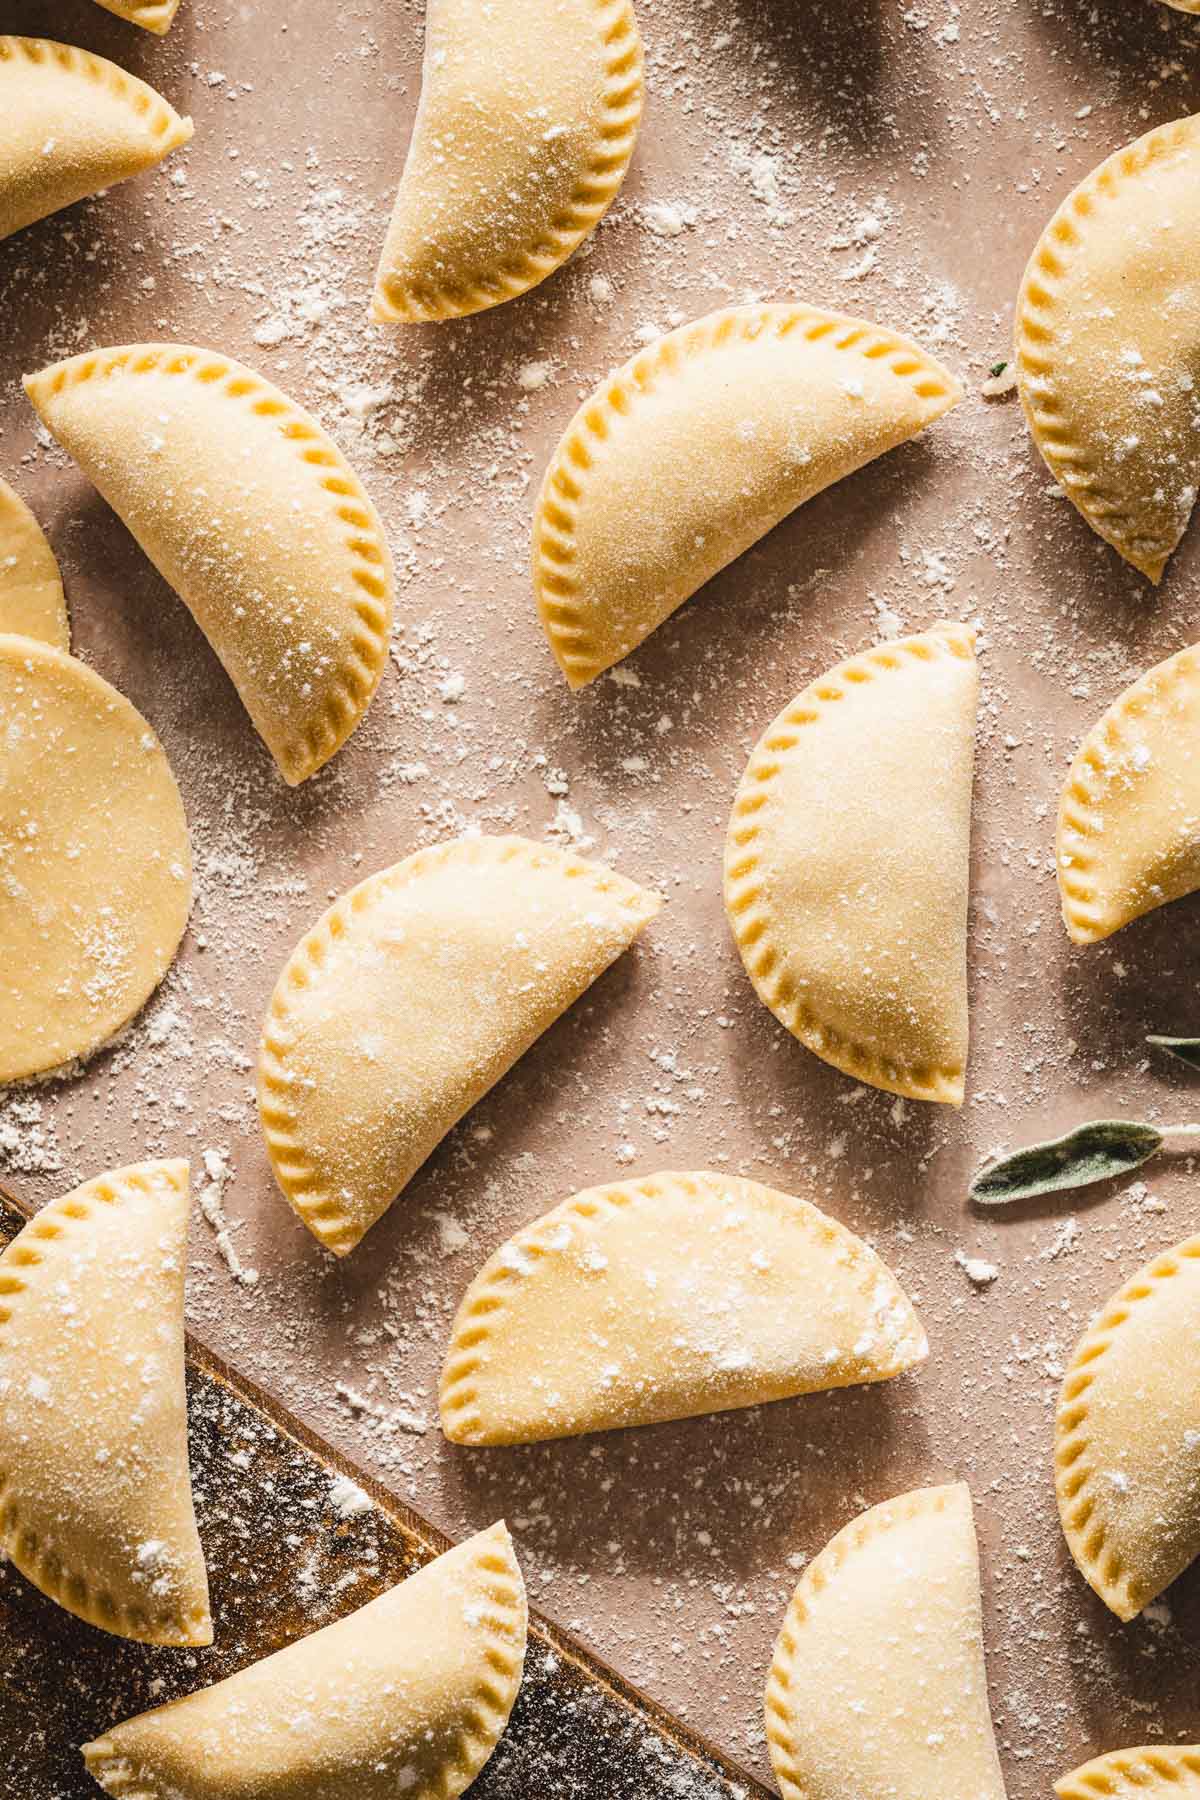
- Press the edges firmly to seal, then crimp with a fork (or use a pierogi press) to prevent leaks during cooking.
- Bring a large pot of salted water to a boil. Drop in a few pierogi at a time, being careful not to overcrowd the pot.
- Boil until they float to the top, then cook for another 2–3 minutes to ensure the filling heats through.
- Use a slotted spoon to remove the pierogi from the pot and transfer them to a plate. Repeat until all pierogi are cooked.
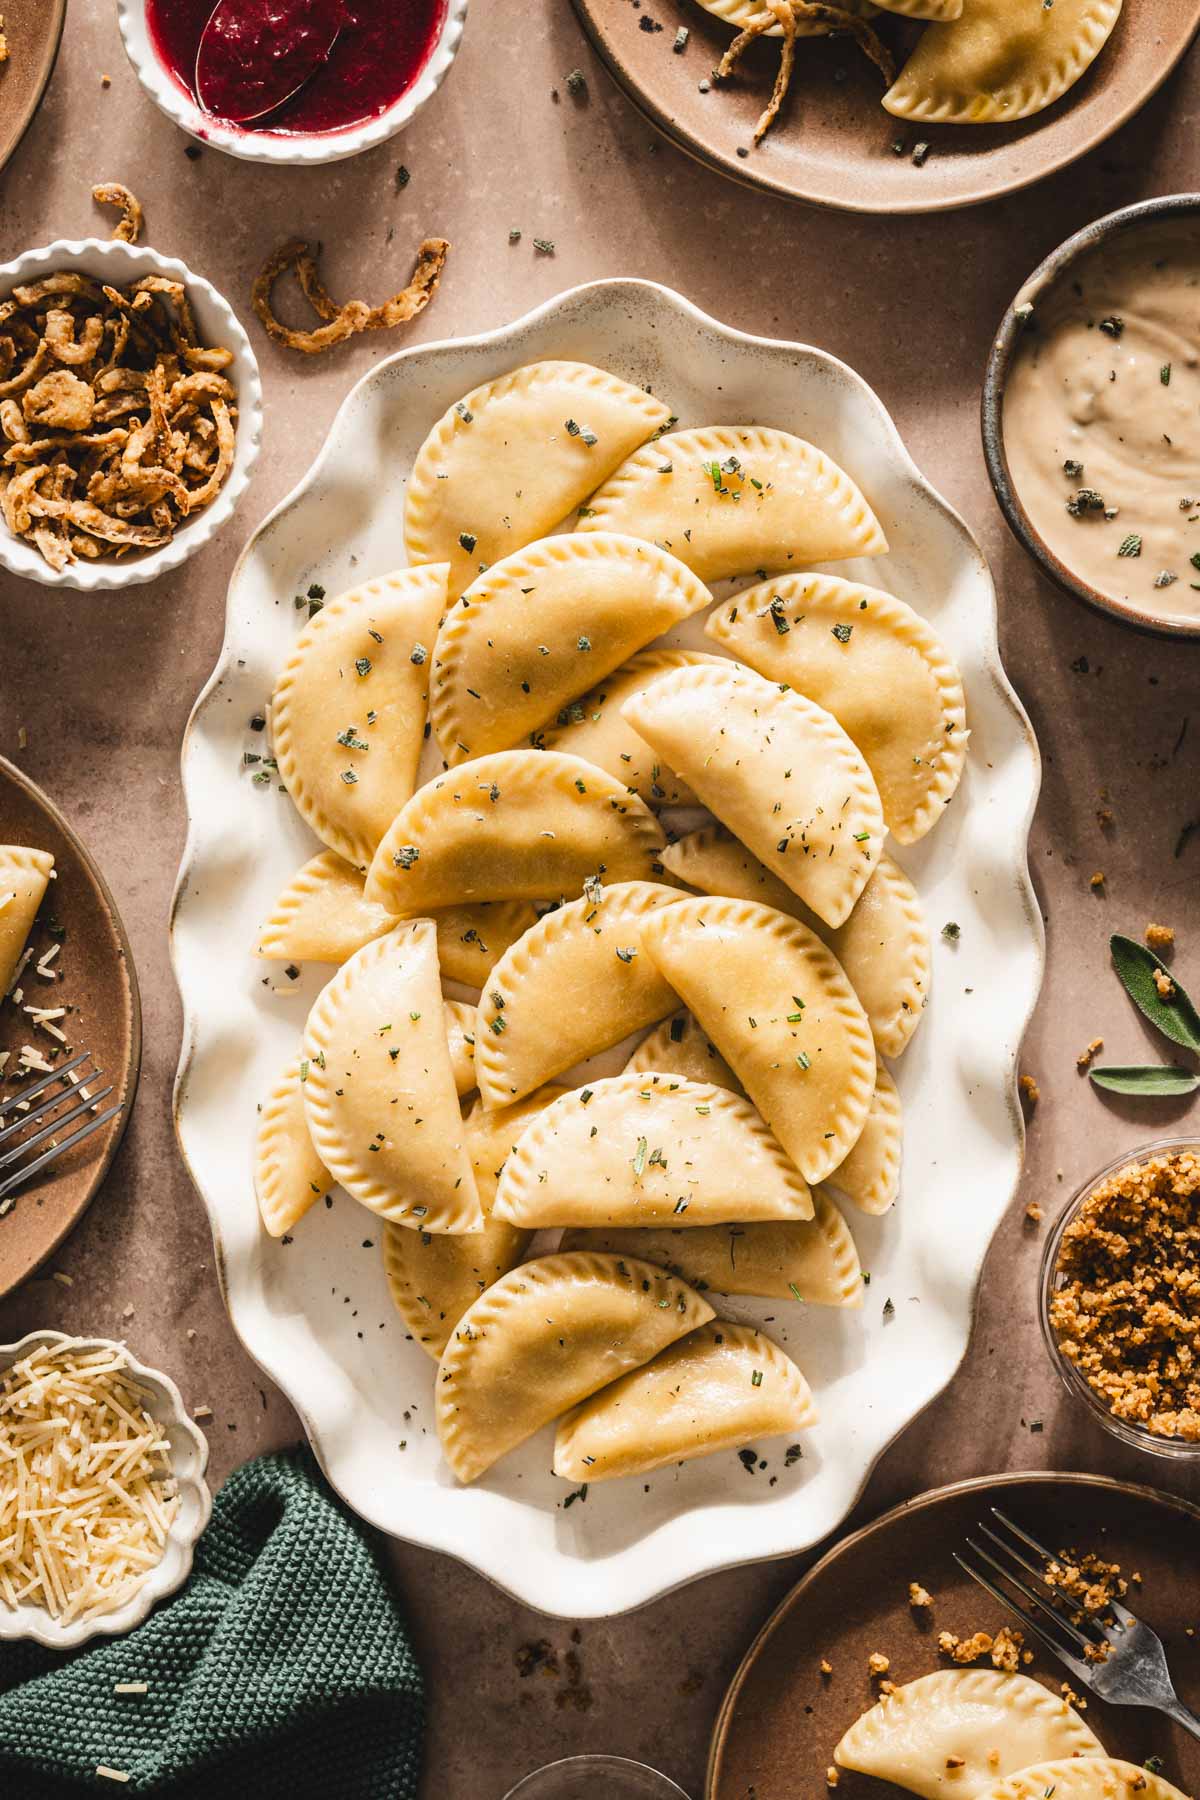
The best ways to enjoy Turkey-Stuffed Pierogis
- Pair with Cranberry Sauce, Gravy, or Mushroom Sauce
- Top with Crispy Onions or Fresh Herbs (chives, parsley or more sage)
- Serve with fresh salad, light soup, or a side of green beans
- Top Turkey Pierogis with bacon bits, brown butter or sage butter
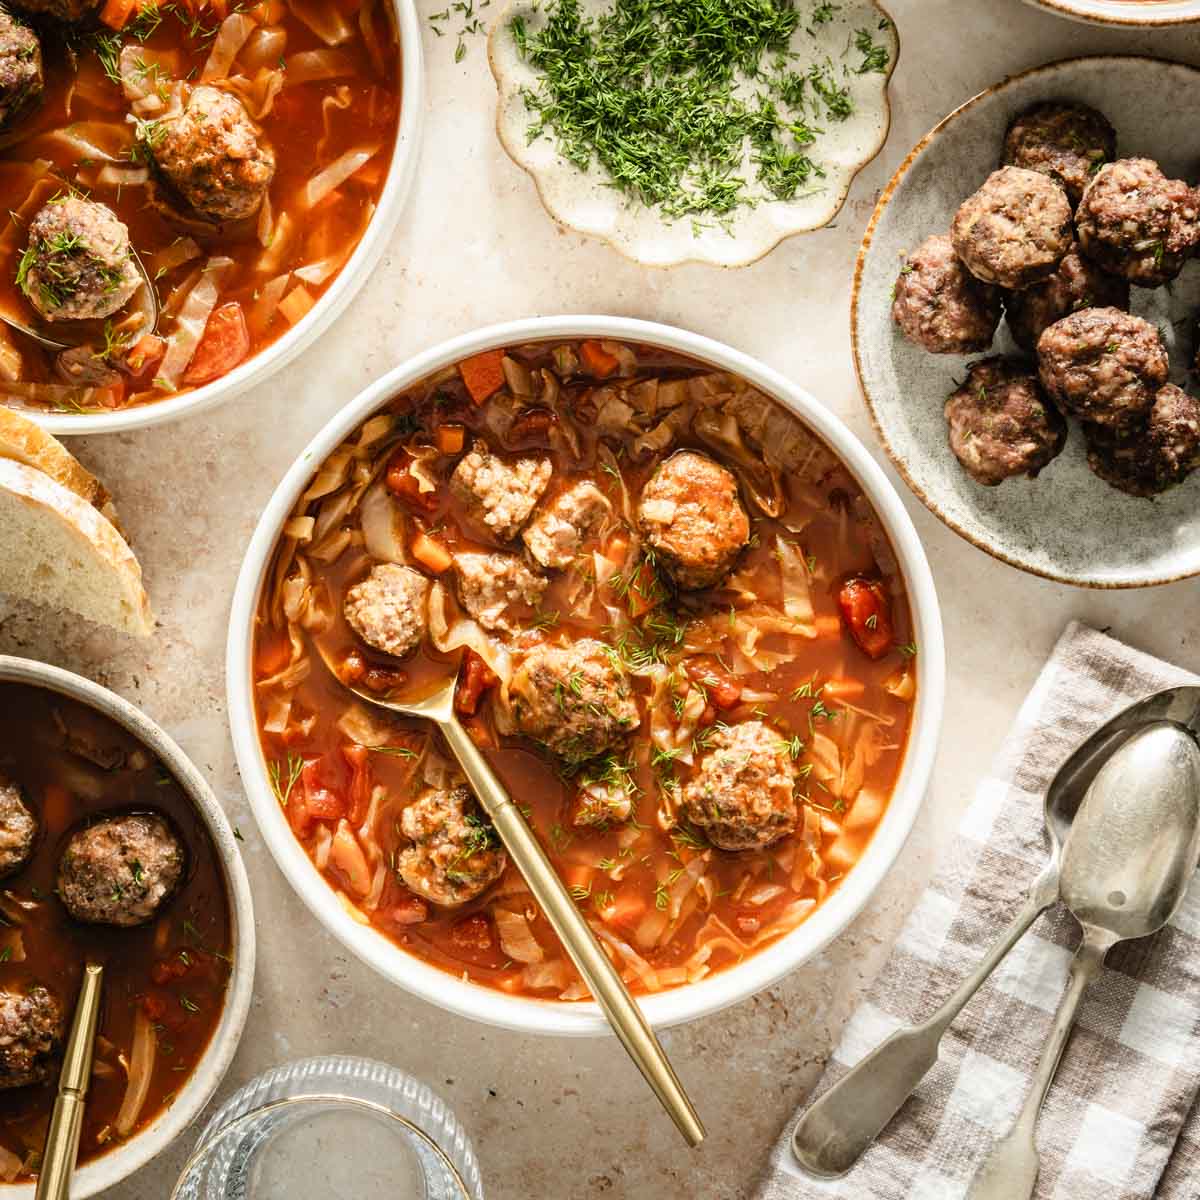
- Pair with light soup like Polish Beet Soup (borscht) or simple vegetable soup
- Serve with dry white wine, light beer, or even sparkling water with a hint of lemon.
You may also like:
Storage instructions, reheating
Refrigerating
- Cooked Pierogi: Place the pierogi in an airtight container and refrigerate for up to 3 days.
- Uncooked Pierogi: Arrange in a single layer on a parchment-lined baking sheet and refrigerate for up to 24 hours before cooking.
Freezing
- Uncooked Pierogi: Place them in a single layer on a parchment-lined baking sheet and freeze for 2-3 hours, until solid. Once frozen, transfer to a freezer-safe bag or container and store for up to 2 months.
- Cooked Pierogi: Let them cool completely, then freeze in a single layer on a baking sheet. Once frozen, transfer to a freezer-safe bag or container. This method will help prevent sticking and freezer burn.
For Refrigerated Pierogi
- Boiled Only: Reheat in a skillet with a bit of butter or oil over medium heat until warmed through, about 3-4 minutes per side, for a slightly crispy texture.
- Boiled and Pan-Fried: Reheat in a preheated oven at 350°F (175°C) for about 10 minutes, or pan-fry on the stove in a bit of butter for 2-3 minutes per side until hot.
For Frozen Pierogi
- Uncooked Frozen Pierogi: Drop directly into boiling salted water without thawing. Cook until they float to the top, then let simmer for an additional 2-3 minutes. If you like a crispy finish, follow up with a quick pan-fry in butter.
- Cooked Frozen Pierogi: Reheat from frozen in a skillet over medium-low heat with a bit of oil or butter, covering with a lid for the first 5-7 minutes to heat them through, then removing the lid and frying for another 3-4 minutes per side until crispy.

Best Turkey-Stuffed Pierogis with Herb Ricotta Filling
Equipment
- mixing bowls
- Rolling Pin
- sharp knife
- 3-inch round cutter
- spoon, small scoop
- fork or pierogi press
- large pot
- slotted spoon
- stand mixer optional
- non-stick frying pan or cast iron skillet
Ingredients
For the Dough
- 5 cups all-purpose flour
- 2/3 cup sour cream for richness!
- 2 large eggs
- 1/4 cup unsalted butter melted
- Pinch of salt
For the Filling
- 2 cups shredded turkey
- 1/3 cup ricotta cheese
- 1/3 cup grated Parmesan or Gruyère cheese
- 1 small onion
- 2 tsp fresh sage
- 2 tsp fresh rosemary
- Salt and pepper
Instructions
- In a large mixing bowl, combine flour and salt.
- Whisk together sour cream and egg in a separate small bowl. Pour this into the flour mixture.
- Stir until the dough comes together, then knead it on a floured surface for about 5 minutes until smooth and elastic. (If it’s sticky, add a bit more flour, 1 tablespoon at a time.)
- Wrap the dough in plastic wrap and let it rest at room temperature for at least 30 minutes.
- Heat one tablespoon of butter in a skillet over medium heat. Add a finely chopped small onion and cook until softened and translucent, for about 3–4 minutes. Remove from heat and let cool slightly.
- Place shredded turkey into a food processor and pulse briefly to make it finer and smoother. Avoid over-processing; you want it soft but not a paste.
- Add the ricotta, herbs, parmesan cheese, cooked onion, and salt and pepper to the turkey meat, and pulse a few more times to mix the ingredients.
- Transfer the processed turkey filling to a large bowl. Taste and adjust the seasoning if needed.
- Roll out the rested dough on a lightly floured surface until it’s about 1/8 inch thick.
- Cut out as many circles as possible using a 3-inch round cutter or the rim of a glass. Gather the scraps, re-roll, and cut additional circles until all the dough is used.
- Place about one teaspoon of the turkey filling in the center of each dough circle.
- Lightly moisten the edge of each circle with a dab of water, then fold it over to form a half-moon shape.
- Press the edges firmly to seal, then crimp with a fork (or use a pierogi press) to prevent leaks during cooking.
- Bring a large pot of salted water to a boil. Drop in a few pierogi at a time, being careful not to overcrowd the pot.
- Boil until they float to the top, then cook for another 2–3 minutes to ensure the filling heats through.
- Use a slotted spoon to remove the pierogi from the pot and transfer them to a plate. Repeat until all pierogi are cooked.
Notes
Nutrition
Did you make this recipe?
Tag me @sylwiavaclavekphotography or tag me using #myomnikitchen so I can see your creations! You can also leave a comment below!
Conclusion
Looking for a unique way to bring a Polish twist to your Thanksgiving table? These Turkey-stuffed Pierogis are the perfect fusion of tradition and holiday flavor! Packed with shredded turkey, creamy ricotta, and fragrant herbs, they’re delicious. Pair them with a velvety sage-infused gravy or a tangy cranberry sauce for a dish that’s sure to impress family and friends.
Take your Thanksgiving leftovers or fresh pulled turkey and make this amazing dish. Combining the comforting fall flavors of sage, rosemary, and a creamy ricotta filling, these dumplings are a perfect treat for special occasions. Whether served with gravy, cranberry sauce, or crispy fried onions, they’re a flavorful celebration of the holiday season.
FAQ about Turkey-Stuffed Pierogis
Can I make the pierogi dough ahead of time?
Yes, absolutely! You can prepare the pierogi dough up to 24 hours in advance. Wrap it tightly in plastic wrap and store it in the refrigerator until you’re ready to roll it out. Let it sit at room temperature for 10–15 minutes before rolling to make it easier to handle.
What’s the best way to reheat leftover pierogi?
Reheat leftover pierogi by pan-frying them in butter over medium heat until golden and crispy. Alternatively, you can steam them briefly or microwave them with a damp paper towel to keep them moist. Avoid boiling already-cooked pierogi, as they may fall apart.
Can I freeze these pierogi?
Yes, these pierogi freeze beautifully! Lay the uncooked pierogi on a baking sheet in a single layer and freeze until solid. Once frozen, transfer them to a freezer-safe bag or container. Cook them straight from frozen by boiling or pan-frying; no need to thaw.
Can I use leftover Thanksgiving turkey instead of cooking fresh turkey?
Definitely! Shred or finely chop your leftover turkey and use it as the base for the filling. Mix in a little extra ricotta or stock if the meat is dry to keep the filling moist and flavorful.
What can I use instead of ricotta cheese?
If you don’t have ricotta, substitute it with cream cheese, cottage cheese (blended until smooth), or mashed potatoes for a slightly different texture. Adjust seasoning as needed.
Can I bake the pierogi instead of boiling and frying them?
While traditional pierogi are boiled or fried, you can bake them for a unique twist. Brush them with melted butter, arrange them on a parchment-lined baking sheet, and bake at 375°F (190°C) until golden brown, about 15–20 minutes.
What other sauces pair well with these pierogi?
In addition to the sage-infused gravy and cranberry sauce, you could try a creamy mushroom sauce, sour cream with fresh dill, or even a simple garlic-butter sauce. Each adds a unique flavor profile.
Can I make these pierogi vegetarian?
Yes! You can replace the turkey filling with mashed sweet potatoes, sautéed mushrooms, or a mix of ricotta and spinach. Adjust the seasoning to maintain the delicious, savory profile.
Why is my dough tearing when I fill the pierogi?
This can happen if the dough is rolled too thin. Aim for about 1/8 inch thickness for the perfect balance between sturdiness and tenderness. If it still tears, knead the dough again with more flour to make it more elastic.
How do I prevent the pierogi from sticking together?
After boiling, lightly toss the pierogi in melted butter or oil before serving or storing. If you’re freezing them, place them on a floured or parchment-lined surface in a single layer until solid before transferring them to a container.