Polish Sausage (Biala Kielbasa) stuffed Pierogi recipe.
Tender dough packed with juicy, perfectly seasoned Polish sausage and cream cheese, these Biala Kielbasa Pierogi are crave-worthy. This is the dish that brings generations to the table.

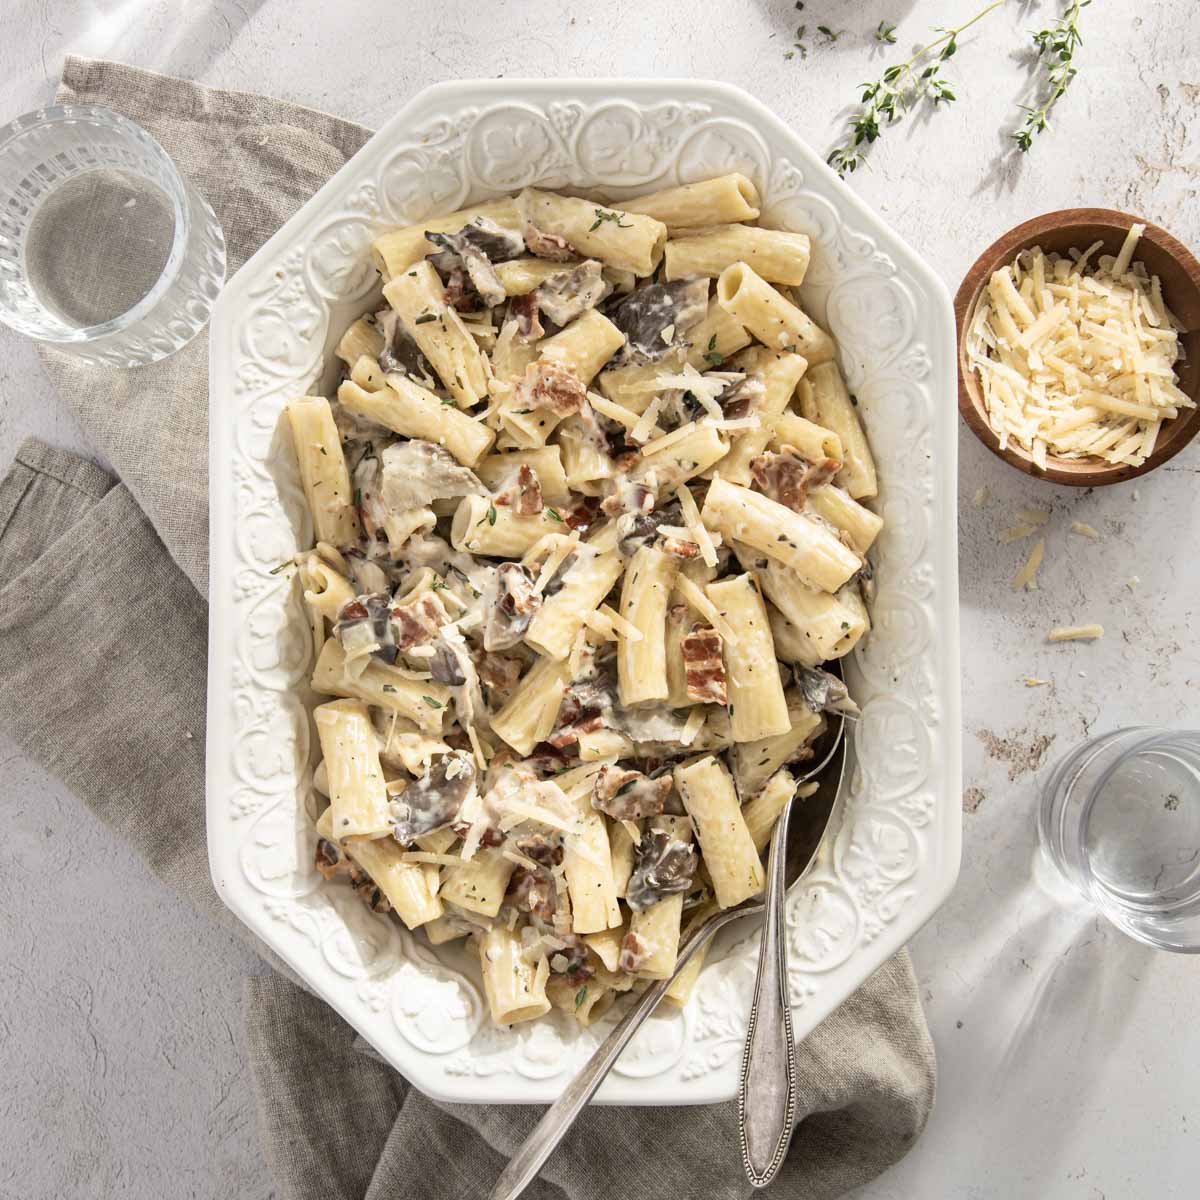
Rich, cheesy, and savory with just the right amount of spice, these pierogi are the definition of comfort food.
These Polish sausage-stuffed pierogi are hearty and ridiculously satisfying. Perfect with a dollop of sour cream or a spoonful of tangy mustard dip. No frills, just full-on flavor.
Why you will love Kielbasa Pierogi
Bold, savory flavor – Juicy biała kiełbasa (Polish white sausage) gives the filling tons of flavor without needing a long list of ingredients.
Comfort food next level – enough said. They are perfect for dinner, supper, or anytime you crave dumplings.
Freezer – friendly – make a double batch and freeze for later.
Ingredients, Variations and Substitutions

Biala Kielbasa – this fresh, uncured sausage is garlicky, juicy, and full of flavor. You can make your own or get one from the grocery store. Look for high-quality kielbasa with minimal fillers and a good balance of fat for the best flavor and texture. You want it fully cooked before stuffing it into the pierogi. No biała kielbasa? Use andouille sausage, turkey sausage, or even chicken sausage.
Cream Cheese – acts as the binder in the filling. The cheese should be soft enough to blend with cooked kielbasa. If using ricotta or cottage cheese (blended) make sure to drain them prior to mixing. Mild or sharp cheddar cheese are great alternatives. For a dairy-free version, use a plant-based soft cheese.
Finely chopped sautéed onion adds flavor, and a hint of sweetness to the kielbasa and cheese filling. It also balances out the saltiness of the sausage. Leek, shallot, or green onion can also be used. Try caramelizing the onion for a sweeter, richer filling.
Mustard adds a lightly sharp, tangy note to the filling. Dijon or Polish-style mustard can enhance the flavor of the kielbasa without overpowering it. Horseradish cream or a touch of apple cider vinegar can give a similar acidity.
White whole wheat flour – is heartier and more nutritious than all-purpose, but softer than regular whole wheat. It absorbs a bit more moisture, so your dough may need slightly more liquid or fat to stay tender. You can mix it with a bit of all-purpose flour to lighten it, or use regular whole wheat flour for a more rustic result. Gluten-free flour blends also work, with a binding agent like xanthan gum.
Sour cream – adds richness, tang, and moisture to the dough, making it easier to work with. It also helps create a tender bite once cooked. Don’t overdo it, too much sour cream can make the dough overly soft and sticky. Plain Greek yogurt works great, or use full-fat plain yogurt thinned slightly with milk if needed.
Egg is used in the pierogi dough to help bind the flour and sour cream, giving it elasticity and a tender chew. It also adds richness and a golden hue. You can omit it for an egg-free dough (just up the sour cream slightly), or replace it with one tablespoon of olive oil or melted butter for a softer, more pliable dough.
A splash of olive oil (or melted butter) makes the dough easier to roll out. It also adds a subtle richness. Any neutral oil (like avocado or grapeseed) works, or go with melted butter for a traditional, buttery flavor.
Seasoning – Marjoram, Dill, and Black Pepper, these give the dough an aroma that complements the kielbasa. Go easy on dried herbs so they don’t overpower the dough, 1/2 tsp of each is enough. Try thyme or parsley in place of marjoram or dill, or leave them out if you prefer a plain dough.


Equipment you will need
- Large mixing bowl
- Rolling Pin
- Round cookie cutter
- Pierogi press or fork
- Large pot
- Slotter spoon
- Large skillet or frying pan

Top Tips
Use high-quality kielbasa – the flavor of your filling depends a lot on the sausage. Make your own or get it from a reputable source. Look for fresh, biała kielbasa sausage from a Polish deli or quality butcher.
Don’t skip the cheese – a little cream cheese, ricotta, or farmer’s cheese helps bind the filling and gives a creamy contrast to the sausage. No one wants dry pierogi!
Season your filling – taste before filling! Add a pinch of salt, pepper, or even a little marjoram if your sausage is on the mild side.
Don’t skip the rest – the longer (45 min) rest softens the bran and makes the dough easier to work with.
Keep unused dough covered – it dries out quickly, so work in batches and keep the rest wrapped or under a towel.
Don’t overfill – a heaping teaspoon is plenty. Overfilling leads to bursting pierogi, which is just sad dumpling drama.
Seal them tight – pinch firmly or use pierogi press to seal the edges together. Use a fork for a rustic crimp. A little water on the edge helps if your dough is dry.
What You can prep ahead
Make the dough ahead – wrap it tightly and store it in the fridge for up to 24 hours. Let it sit at room temp for 20–30 minutes before rolling.
Prepare the filling – you can make the kielbasa + cheese filling 1–2 days in advance. Store it in an airtight container in the fridge.
Shape the pierogi and freeze – uncooked pierogi freeze beautifully. Arrange them in a single layer on a parchment-lined tray, freeze until solid, then transfer to a freezer bag. They’ll keep for up to 2 months and cook straight from frozen.
Chop garnishes or make dipping sauce – make your mustard cream, caramelized onions, or horseradish sour cream the day before and keep them chilled.
Step-by-step instructions
- In a large bowl, mix flour, salt, and spices.
- Add egg, sour cream, oil, and warm water gradually. Mix until a shaggy dough forms.


- Knead on a lightly floured surface for about 5–7 minutes, until smooth and elastic.
- Wrap the dough tightly in plastic and let it rest at room temperature for at least 45 minutes (or up to 24 hours in the fridge). This step is key—resting relaxes the gluten, making the dough easier to roll.
- In a skillet, sauté the chopped onion in a little oil until soft and golden.
- Add garlic and cook 1 minute more.
- Let cool slightly, then mix with the kielbasa (removed from casing).
- Add marjoram, mustard, and parsley. Taste and season with salt & pepper.


- Fold in the cream cheese to bind the sausage filling.


- Roll out the dough to about 1/8-inch thick
- Cut circles (about 3 inches across).
- Place a spoonful of filling in the center of each.
- Fold over, seal edges well (use water if needed), and crimp with fingers or a fork.


- Bring a large pot of salted water to a gentle boil.
- Boil pierogi in batches—when they float, cook 1–2 minutes more.
- Optional: pan-fry in butter with onions until golden after boiling. (Highly recommended.)


The best ways to enjoy Kielbasa Pierogi.
Boiled and buttered – cook the pierogi in chicken broth (flavor enhancer) and toss them in melted butter.
Pan-Fried – after boiling, give them a quick fry in a buttered skillet until golden brown and crispy on both sides. The edges get beautifully crunchy, while the inside stays soft and savory.
With a simple sauce – serve alongside creamy yogurt sauce (with horseradish or dill) or homemade mushroom sauce. Top with fresh parsley or green onions.
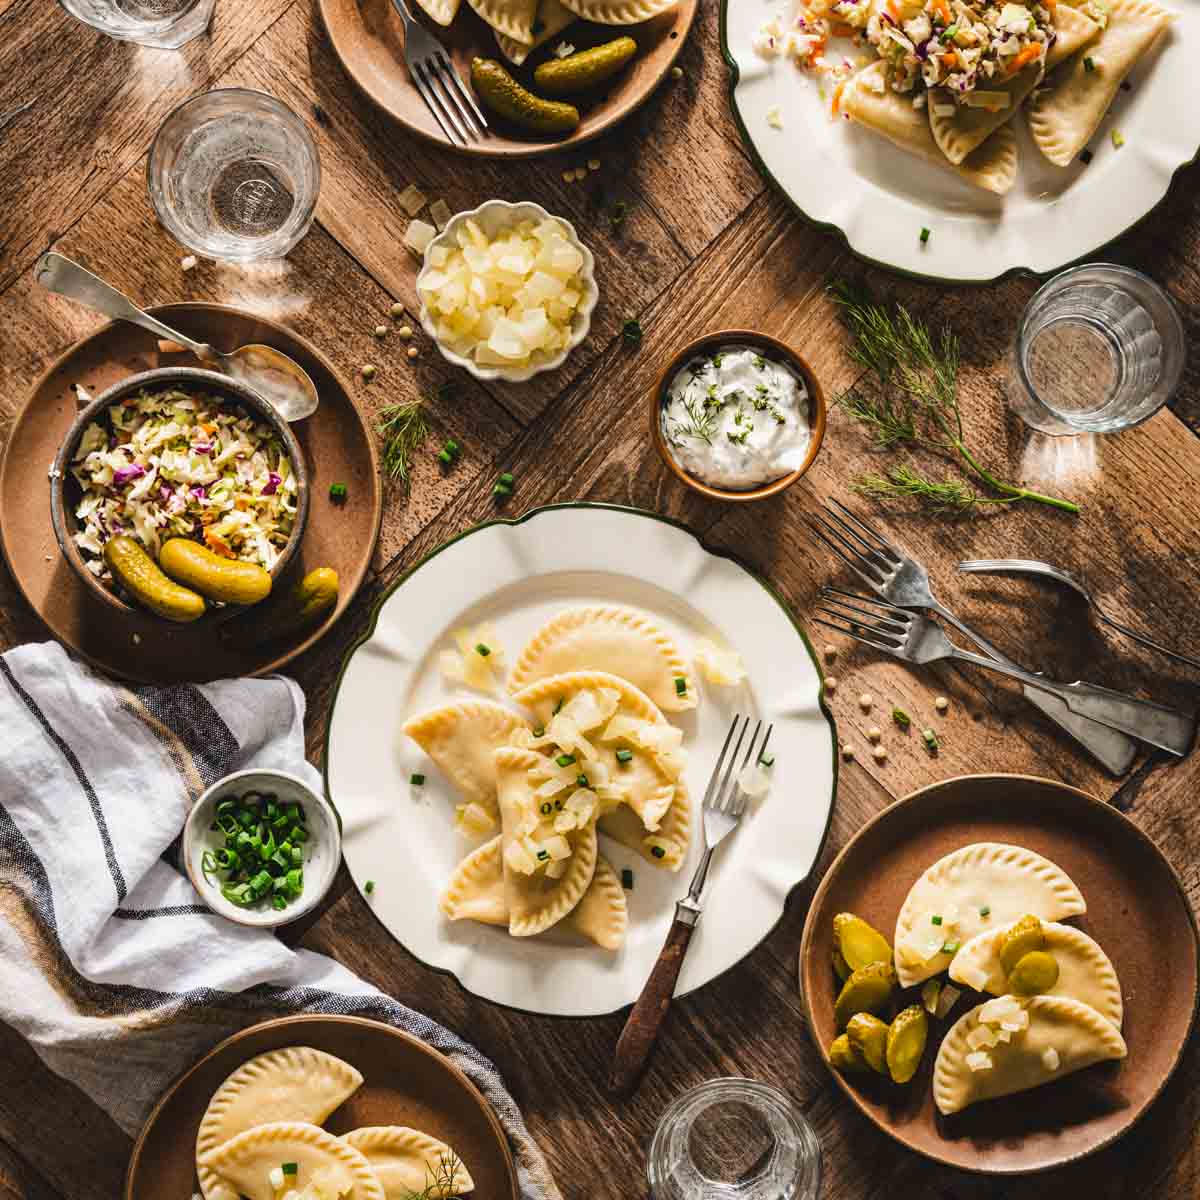
Loaded Pierogi platter – pile them high and serve with caramelized onions, fresh dill, pickled veggies, and extra sauces for dipping.
With soup or salad – turn it into a complete meal with a bowl of barszcz (beet soup), Zurek (sour rye soup), or
Enjoy for breakfast – pan-fry leftover pierogi and top with a fried egg, chives, and a spoon of sour cream. It’s like breakfast-for-dinner… but better.
Pierogi skillet – best for busy nights, a hearty dish the whole family will enjoy. Crisped-up pierogi, caramelized onions, smoky sausage, all topped with herbs and a dollop of sour cream.

More amazing recipes You may like:
Storage instructions, reheating
Refrigerating
Once cooked, allow the pierogi to cool completely. Store them in an airtight container in the fridge for up to 4 days. Layer them between sheets of parchment paper or lightly oil them so they don’t stick together.
Freezing (Cooked or Uncooked)
- Uncooked pierogi: Freeze in a single layer on a parchment-lined baking sheet. Once frozen solid, transfer to a zip-top bag or freezer-safe container. They’ll keep well for up to 2–3 months.
- Cooked pierogi: Follow the same process. Let them cool completely before freezing. These are great for a quick lunch later!
Reheating
Pan-Frying
Add a little butter or oil to a skillet over medium heat. Fry refrigerated or thawed pierogi for 2–3 minutes per side until golden and warmed through.
Steaming (Best for Soft Texture)
Place in a steamer basket or colander over simmering water. Steam for 3–5 minutes until heated through. Great for frozen pierogi if you don’t want to boil again.
Boiling (If Reheating Uncooked Frozen Ones)
Drop frozen uncooked pierogi into gently boiling salted water. Once they float, let them simmer for 1–2 more minutes, then drain.
Oven Reheat (For a Big Batch)
Brush lightly with butter or oil, then place in a 350°F (175°C) oven for 10–12 minutes. Flip halfway through if you want a bit of crisp.
Microwave
It works… but it’s not the best. If you must, cover with a damp paper towel and heat in short bursts to avoid rubbery dough.


Polish Sausage (Biala Kielbasa) stuffed Pierogi recipe.
Equipment
- mixing bowls
- Rolling Pin
- round cutter
- large pot
- skillet
- Pierogi press
- slotted spoon
- baking sheet, parchment paper
Ingredients
For the filling
- 2-3 uncooked biała kiełbasa sausages casings removed
- 1 small onion finely chopped
- 1 clove garlic minced
- 1 tsp marjoram dried
- 1 tsp mustard stone-ground or Dijon, optional for a little zip
- Salt & pepper to taste
- 1/4 cup cream cheese for extra creaminess
For the dough
- 3 cups white whole wheat flour 360g
- 1 large egg
- ½ cup sour cream
- ~½ cup warm water
- 1 tablespoon oil
- ¾ teaspoon salt
- ½ tsp dried marjoram
- 1/2 tsp dried dill
- ¼ tsp black pepper
Instructions
- In a large bowl, mix flour, salt, and spices.
- Add egg, sour cream, oil, and warm water gradually. Mix until a shaggy dough forms.
- Knead on a lightly floured surface for about 5–7 minutes, until smooth and elastic.
- Wrap the dough tightly in plastic and let it rest at room temperature for at least 45 minutes (or up to 24 hours in the fridge). This step is key—resting relaxes the gluten, making the dough easier to roll.
- In a skillet, sauté the chopped onion in a little oil until soft and golden.
- Add garlic and cook 1 minute more.
- Let cool slightly, then mix with the kielbasa (removed from casing).
- Add marjoram, mustard, and parsley. Taste and season with salt & pepper.
- Fold in the cream cheese to bind the sausage filling.
- Roll out the dough to about 1/8-inch thick
- Cut circles (about 3 inches across).
- Place a spoonful of filling in the center of each.
- Fold over, seal edges well (use water if needed), and crimp with fingers or a fork.
- Bring a large pot of salted water to a gentle boil.
- Boil pierogi in batches—when they float, cook 1–2 minutes more.
- Optional: pan-fry in butter with onions until golden after boiling.
Notes
Nutrition
Did you make this recipe?
Tag me @sylwiavaclavekphotography or tag me using #myomnikitchen so I can see your creations! You can also leave a comment below!
Conclusion
There’s nothing more satisfying than a plate of homemade pierogi. This version takes it up a notch with traditional Polish Biała kiełbasa tucked inside each tender dough pocket.
You don’t need any fancy gear to make these pierogi. Roll up your sleeves and let’s get cooking.


FAQ
What cheese works best in the filling?
Cream cheese, ricotta, or Polish twaróg (farmer’s cheese) all work well. You want something soft and mild to complement the kielbasa.
Can I use smoked sausage instead of white sausage?
Totally! The flavor will be smokier and a bit saltier, but still delicious. Just make sure it’s finely chopped or pulsed in a food processor.
How do I keep pierogi from sticking together?
Toss cooked pierogi gently with butter or a little oil. If you’re freezing them, keep them in a single layer until they’re frozen solid.
Do I have to boil them before frying?
Boiling ensures they’re fully cooked inside. Once they float, you can toss them into a hot skillet with butter for that crispy exterior.


Hungry for more? Check out the latest posts from My Omni Kitchen.
- Best Mushroom-Stuffed Deviled Eggs Recipe
- Best Upside down Carrot Cake Recipe
- Red Cabbage with Celery Root and Apple Slaw Recipe
- Reuben Salad with Mustard Dressing Recipe
- Leftover Corned Beef and Potato Soup Recipe